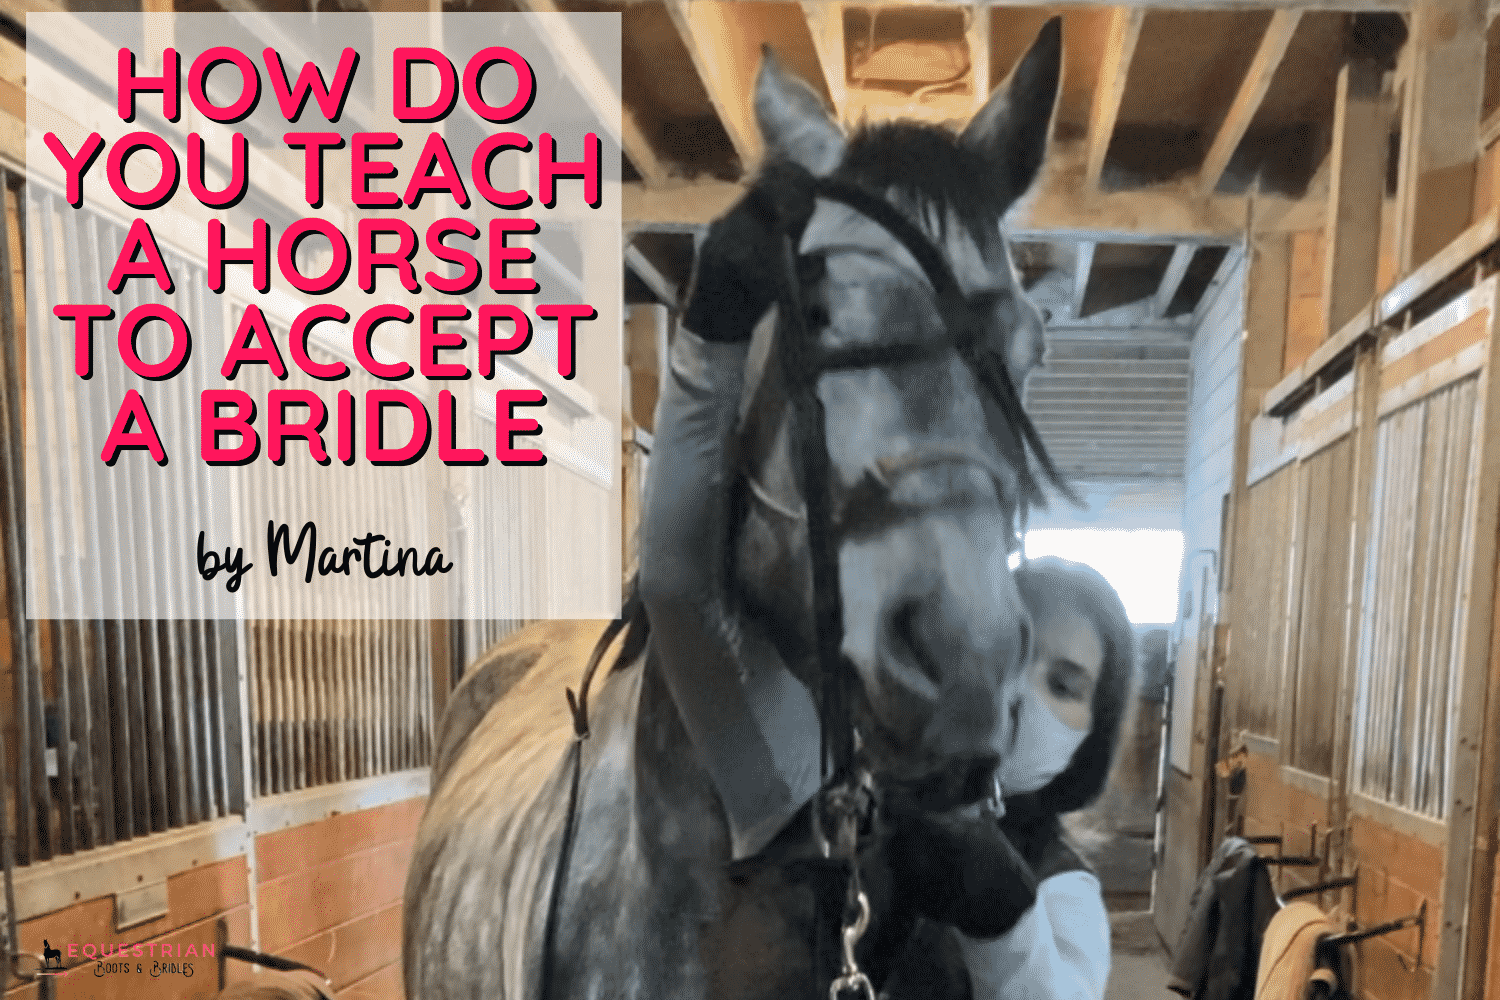
Wondering why your horse won’t take the bit and keeps throwing his head? In my horse’s first week of training, I ran into this issue so I’ll walk through how do you teach a horse to accept a bridle by breaking the problem down and coming up with a training plan.
This is one in a series of many posts outlining Rudy’s training journey with me! Rudy is my first young horse. I got him as a 4 year old and he’s a grey gelding warmblood cross. In this post, I’m going to talk about his first week in training and a big issue we had right off the bat: bridling and how do you teach a horse to accept a bridle.
First, let me say that I watched probably 30 different youtube videos on bridling while this was happening and NONE of them helped. So if you’ve tried everything out there and it’s still not working for you, you have come to the right place.
If you’d like to jump directly to my issues bridling and how to fix them, you can do so via the Table of Contents below, although you might find some other useful tid-bits of information when you go through Rudy’s 1st week in training!
Other Posts About Rudy’s Training Journey You Might Enjoy:
- Building A Young Horse Training Plan for Rudy
- Week #2: How Do You Deal With A Pushy Horse?
- Week #3: [Coming Soon!]
If you’ve read the first post in this series, Building A Young Horse Training Plan, you’ll see how I came up with a plan for myself on what I was going to work on with Rudy. I’ve re-copied this plan below under “Rudy’s Initial Training Plan For Week #1”.
As you’ll come to realize very quickly. These types of plans can fall apart very fast and often need to be changed day by day.
You might be wondering (and rightly so!) what the point of putting together a plan is at all? I find that it’s very helpful to go to work with a horse with a clear intention of what you’d ideally like to achieve. I’ve found from my time working with and riding horses that it gives me a much better chance of having a productive time.
Not only do I not put any pressure on myself (or my horse) to achieve my plan, I also don’t need to have a very lofty plan.
Sometimes my goal for the day might just be to bond with Rudy. I might make a plan to do some very easy-going liberty work or walk with him while he grazes or respond to all of his stress indiciators and just hang out with him in the indoor arena while he explores.
The important part is just to have a plan and be ready to improvise if necessary! For me, the more likely I am to have to improvise, the more detailed I am with “what if…” statements in my plan. You’ll see what I mean as we go through this post.
Rudy’s Initial Training Plan For Week #1
1 hour/day for 4-5 Days/Week
Daily Plan:
- 20 minutes: Grooming & Bridling
- 20 minutes: Work in Hand
- 10 minutes: Free-Roam in the Arena/Rolling/Liberty
- 10 minutes: Leading & Exploring
DAY 1: Troubles Standing Still, Imbalances in Strength & Flexibility, Rolling At Inappropriate Times
The first day of training is when a lot of stuff comes up. I knew I would have to be patient with Rudy.
The first thing I learned about Rudy today is that he did NOT like to stand still in the crossties. He was, of course, new to the stables and to me though so I made sure that I was staying incredibly patient witth him. I knew it would take him some time to settle into his new surroundings and start to feel comfortable.
Although it can definitely be a little bit frustrating working with a horse that’s always moving, being as calm as possible myself would hopefully make him calmer too.
I was able to get a bit of stretch going during the work in hand with Rudy on his first official training day! He was definitely stronger on the right than to the left. If you’re not familiar with work in hand, I would really suggest reading this post: How to Calm an Anxious Horse. Work in hand isn’t just great for anxiety (as it releases endorphins) it’s also excellent for strength, balance and flexibility. You can also directly check out Will Faeber’s explanation at Art2Ride.com (he’s an expert on it!) for information on work in hand.
An imbalance in strength is not unusual and is often more apparent in young horses as they’re still developing.
Rudy’s right hind seemed to be stronger than his left hind which made it easier for him to push from his hindquarters into the stretch on the right as he was bending his body right. His right shoulder, however, was quite a bit stiffer than his leeft; however, so I found that I had to push out quite a bit more on that side to help him support that shoulder and prevent him from falling inwards.
The one thing I did not expect with Rudy is his love of rolling! We’ll get more into this during week #2. I didn’t have a great way of handling it on this first day because I just wasn’t prepared, so I let him roll (a total of 4 times!) with the bridle on while I was trying to work with him. Thank goodness I didn’t have my saddle yet!!!
Rudy also loved to free roam in the arena. I noticed immediately he was nervous about the far end of the indoor arena when I did a walk through on the day he arrived, which is why I made sure to block in time every day to let him explore. Once I let him loose in the arena, he would stiff everything, play with the pylons, jumps and barrels and he would roll again!
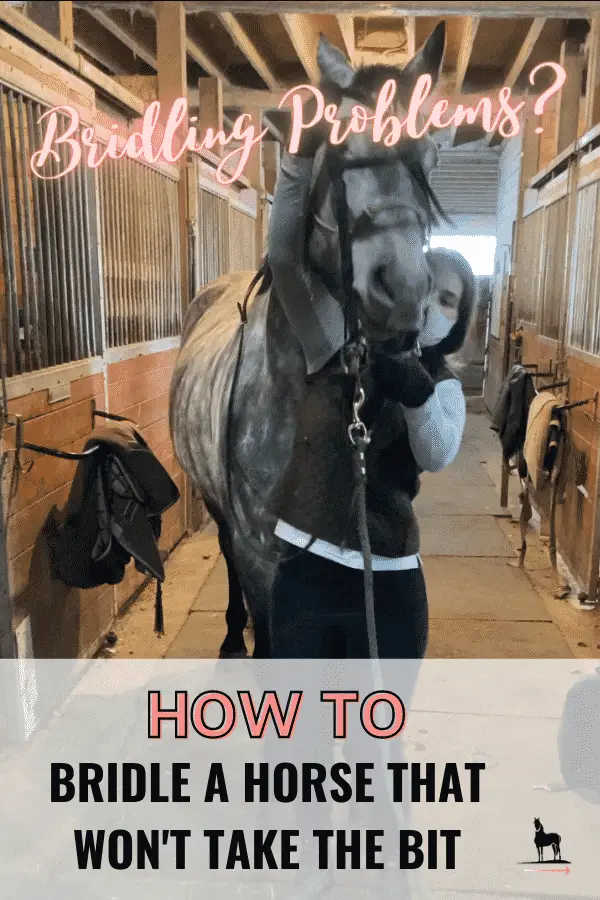
DAY 2-3: Throws Head While Bridling, Pawing
Rudy stood better in the crossties during the next few days of training as he adjusted to me and to his new home. He was quite fidgety on Day 1 and had a hard time keeping his feet still. One thing that did start to come up was pawing.
As he realized that he couldn’t really move anywhere while he was to stand still in the crossties, he took out that nervous energy as pawing instead of walking forwards and backwards.
Talking to on of the other boarders that was around, I learned that what can help with this is to walk away as soon as the horse starts pawing so that they don’t get any attention at all. (UPDATE!: I find what works really well with pawing is to be mindful of what’s happening when they start pawing. For me, after I gave Rudy a treat, he would paw for another so I stopped giving him treats in the crossties. Also, he would paw ight when I was about to start using a curry comb around his girth groove. He is very sensitive around this area so I would brush it last and only if he was okay with it. I know that this is going to be controversial but I find it’s very helpful to be mindful and to be sensitive to things that bother our young horses. After a while, he was totally fine with me brushing everywhere so it did not seem to teach him any bad habits.)
I know I talk a lot about the “negatives” but that’s because, those are the things that require focus to imrpove on in training. We obviously need to make all the basics good before we can improve upon things that are already good. I do want to mention that Rudy was responding really nicely to pressure. He had no problem moving over in the crossties for instance to the slightest pressure. He was also excellent at lifting his hooves to have them picked and he had no issue being blanketed.
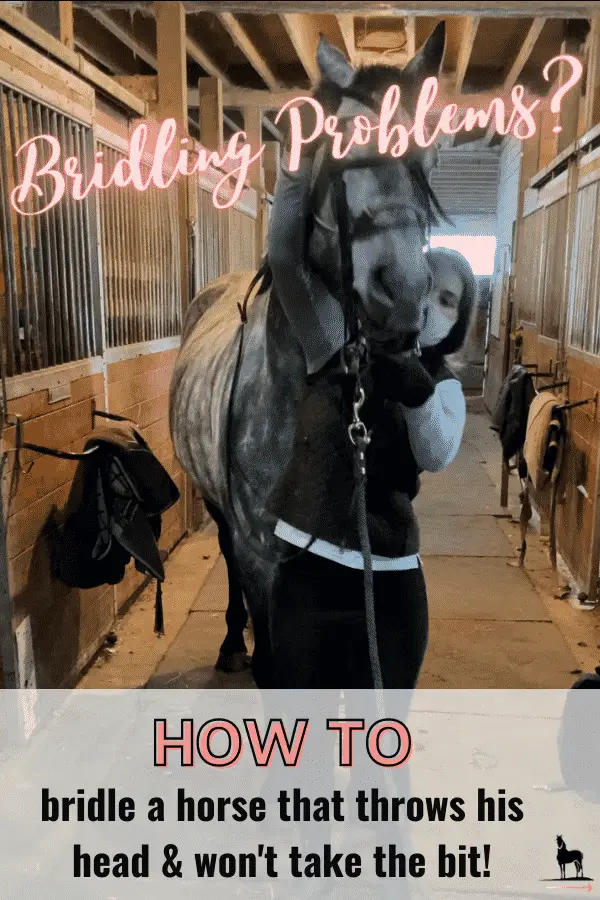
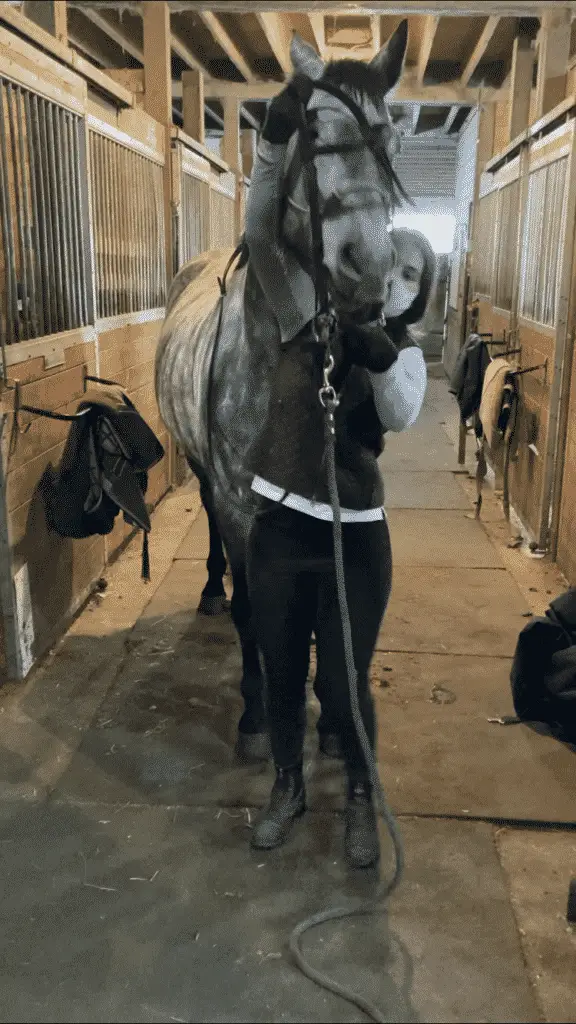
Both day 2 and 3, Rudy decided that he was not going to accept the bridle at all. He wasn’t super comfortable about it on day 1 either but I wasn’t expecting an issue on day 1 so I bridled him without really thinking about it (the previous owner said he was amazing with being tacked up) and when he was being a little bit difficult, I was probably too aggressive with forcing the bit on him.
On the next days, when I was expecting it, I was going a little bit more deliberately and slower so that I could try and figure out exactly which part Rudy was having trouble with. It turns out it was a little bit of a few issues:
- absolutely refusing to accept the bit
- a little bit head shy (especially around the eyes)
- throwing his head and backing up to avoid things
After two training days in a row of struggling with this and not being successful, I decided to come up with a new training plan that focused solely on bridling. Without getting the bridle on, I couldn’t do any of the work in hand stuff which I felt was going to be the most beneficial ultimately to Rudy’s training so I wanted to get that good first.
Why Getting Frustrated & Aggressive is Never the Right Answer
I also want to mention that another boarder at the barn saw that we were struggling with the bridle. She asked if she could try bridling him. I didn’t know her that well but I was struggling enough and frustrated enough that I figured it coudldn’t hurt.
She proceeded to be extremely aggressive with Rudy. She yanked his head down aggressively with the halter, elbowed him in the face and in the neck several times when he got a little bit pushy with her and attemptd to try to slam the bit into his teeth multiple times. Needless to say, this did not work. Rudy was just significantly more agitated at this point.
I immediately took him back and tried to soothe him. Personally, I think that one incident set him back and is the only reason I couldn’t bridle him for another whole week after that. I stopped trying to bridle him at that point and just lunged him on just a halter.
On the lunge, he kept dropping his shoulder in towards me and he would stop and face me a lot. I didn’t let this phase me and just applied pressure until he moved away from me. After getting a few solid trot circles, I would stop so that Rudy learned the second he started doing it right he would be rewarded with rest. Slowly over time, I could build up his stamina to doing the right thing for a bit longer and longer.
On the bright side, Rudy was also improving significatnly while being led. He was very good at listening whether to move forwards or stop.
DAY 4: My Super-Flexible Horse Training Plan
Once I had established that Rudy was struggling with bridling due to several diffrent issues, I went about trying to corrcect those issues individually and also creating a series of “what if’s” in my training plan.
If the step went well, continue onwarrds. If the step didn’t go well, keep working on it until it goes well or until we run out of time for the day.
Also I should mention that for every single day, it’s so important to end on a positive note!
If I’m trying to bridle and I can’t get it, I end at the moment that Rudy dropped his head for me or that he stopped tossing his head.
Always try to end on a positive note (no matter how small!) when you’re moving on to the next thing or when you’re ending the day with your horse.
To me, my relationship with my horse is always going to be more important than the “performance” or “obidience” level. I would way rather have a strong bond with a completely untrained horse than a grand prix horse that shuts me out and wants nothing to do with me.
Today’s plan given my problems bridling yesterday was:
- catch, halter and lead into barn
- crossties
- remove blanket
- groom
- practice lowering head from some pressure on top of head/down on leadrope
- remember to rock head back and forth gently to lower it more if not responding and then bring it over to my side prior to attempting to bridle
- if he tosses his head up when attempting to lower head into bridling position, follow it higher and shake the lead rope twice just below his chin so it makes a noise when his head is at the highest spot
- once bridling position attained and held, slip halter over neck whiile in crossties and try to put in bit with a treat in left hand/honey on the bit
- if able to bridle, proceed to work in hand
- if comes in while lunging, go back to work in hand
- when untacking, remember to first ask him to lower head off pressure and slowly take the bridle off
- put treat in left hand and slip halter on
- repeat drop head/pressure exercise with lead rope and halter
As it so happens, we got stuck on the lowering head into position for the bridle step.
Update! When You Get Something Hard, End There
As I’m re-reading this a few months after, I’ve learned that it’s really important to end things once you achieve something that’s hard. So instead of “if the bridling goes well, move on to lunging” I would just call it there. Especially since bridling has been the main focus for the past 3 whole training sessions.
As I’m writing this, I’m struggling with Rudy randomly stopping when we ride past one of the paddocks next to the outdoor sand arena. He does it because he doesn’t feel like working now that it’s a lot hotter outside and he’d rather go hang out with his buddies.
Initially I would push him past that point and he would be fine for another 5 minutes and then he would stop again. Each time he would stop, he would be THAT much harder to get going again. This is sooo not what we want. I feel like with an older horse this isn’t as true but with a young horse, when you get through a difficult point, I would just end there. The rest is a big reward and I really think the horse understands what’s happened and also that you understand they’ve reached they’re limit for the day.
Now, that’s not to say 5 minutes into a training day, you call it quits. But if I’ve been riding for 30 minutes on a hot day and if Rudy randomly stops. I’ll work on getting him moving again and then once I’ve got a forward trot or we’ve done a few circles of a nice canter, I’ll call it a day even if I didn’t quite do everything on my plan.
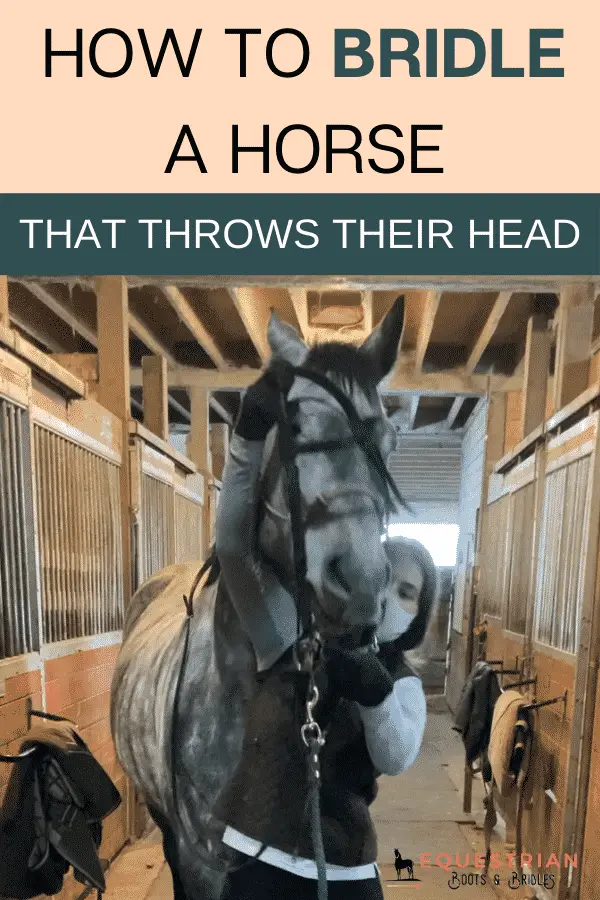
How To Put A Bridle on A Difficult Horse That Throws His Head
As I mentioned before, Rudy was having issues with the following:
- absolutely refusing to accept the bit
- a little bit head shy (especially around the eyes)
- throwing his head and backing up to avoid things
Although Rudy wasn’t having any issues with me getting him from th field, he didn’t like having the halter put on. He wouldn’t walk away from me; in fact, he would usually turn his head and sometimes even walk towards me. The problem was that when I went to go put the halter on him, he would do his head tossing and backing up. This was to a much much lower degree than when I was bridling him; however, it just goes to show that he’s not completly good with the halter even though I can get it on just by staying with him a little bit.
I trully believe that the key to getting things to work well with your horses is a combination of a strong bond and getting the basics rock solid and then contiuing to work on them forever. If you have those two things, everything else starts to fall into place.
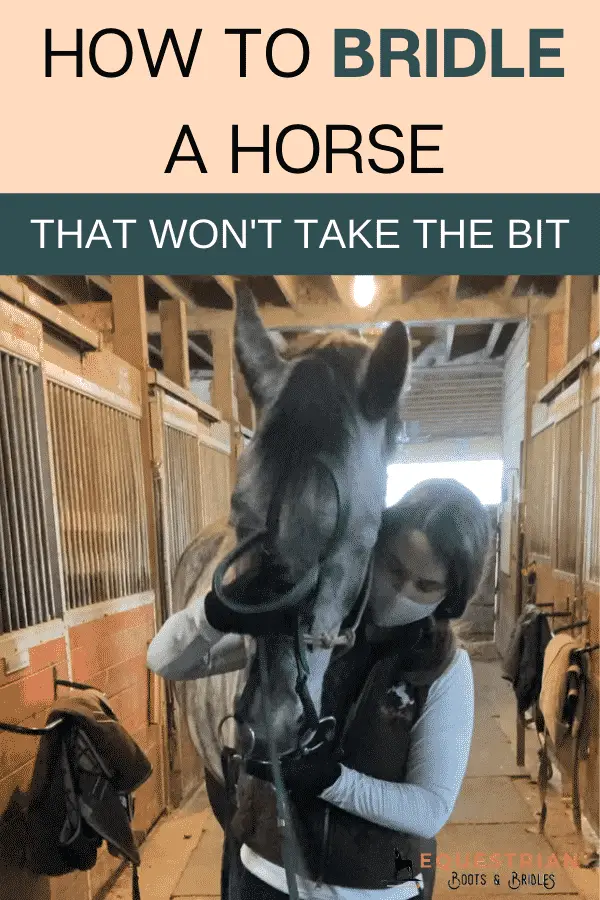
Teaching Your Horse To Accept The Bridle & The Bit Nicely
I was able to fix his bridling issue by middle of Week #2 by following these steps:
Step #1: Bonding
I know. I know. It sounds super “woo-woo” but I swear it helped. Rudy was brand new to the barn and I was new to him. I think that the bonding exercises I did with him helped him to become comfortable with me and his environment much more quickly than he would have otherwise.
These are some examples of what I did:
- hung out with him while he was loose in the indoor arena and focused on my breathing to remain present
- responded to all of his stress indicators by backing off whatever I was doing to stress him out or stepping away (head raising, tail flicking, turning his head away from me)
- lots and lots of hand walking him
- focused on brushing him where he liked it the best
- waiting for signs of relaxation before doing something stressful (i.e. starting to put on the bridle) like licking and chewing, a sigh, lowering of the head, blinking, snorting, yawning, etc.
Step #2: Work on Lowering the Head
I wanted to get Rudy’s response to pressure asking him to lower his head perfect. In order to do that, I would get into position where I would normally put his bridle on from (beside his head on the left side) and I would put my right hand on the top of his head and one hand on the bottom of the halter/on the lead rope and apply steady downwards pressure. If he didn’t drop his head after about 5 seconds, I would start to gently rock his head back and forth while continuing to apply pressure.
Just keep doing this until you get any sort of lowering (even if it’s just a tiny bit!). The second there’s even a little bit of lowering, release all pressure and take your hands away.
Wait a little bit. Maybe wait for a relaxation indicator. And then repeat.
I kept doing this until Rudy dropped his head immediately when I asked him to.
There was a few times throughout this process that Rudy didn’t even want my right hand on his head. When this happend, I would wait for a relaxation indicator and then I would put my hand somewhere in him that he didn’t mind (like on his neck) and then I would slowly slide it up to his head. If at any point he didn’t like it (i.e. gave me a stress response) I would take my hand away. I repeated this until he was fine with my hand there again.
Step #3: Work on Being Head Shy
Basically I repeated the exact same process as when Rudy didn’t want my hand on the top of his head except I would keep going until my hand was on different areas of his face. Then I would do that with a soft brush.
I kept doing this until Rudy was fine with my hand and brushes around his face, ears and closere to his eyes.
Step #4: Opening the Mouth
Rudy simply refused to take the bit. Even when I had a treat in my left hand with the bit and I put honey on the bit (learned those tricks in multiple of the many youtube videos that didn’t help me).
He would sneakily get the treat and then he would clamp his teeth down.
Then when I would try to go to massage his gums so he’d want to open his mouth, he would keep his jaw clamped down tight and start tossing his head. So I knew if I wanted to get the bit in, I’d have to be able to get his mouth open.
This part actually went the fastest. All I did was put my left thumb into the corner of his mouth (as if I was putting the bridle on) once his head was down. The second he opened his mouth, I would take it away.
I would keep doing this until he didn’t care about it anymore and he would keep his head down when his mouth opened.
Step #5: Lunge First
I’ve trained 3 dogs so far (Luna, our portuguese water dog; Echo and Joco, brother German Shepherds that we bought together). One thing I’ve learned from dog training is that it goes a LOT smoother when all that nervous energy is gone. We used to do “play time” with the dogs after their structured walk during which we would work on heel, sit and down.
By the end of the walk, usually things were good but everything was such a disaster at the beginning. Even just getting their leashes on and getting the three of them out the door in an organized fashion was a huge pain because they were SO EXCITED to go out for their walk.
One day, I decided to do “play time” first and it was like having different dogs. They’re usually panting and ready to go lie down in the shade afterwards so if anything, they were a bit sluggish on our walk.
Getting rid of that initial energy and freshness does not replace handling anxiety. If you think your horse is anxious (which Rudy was a little bit too), you can learn more about calming that anxiety here: How to Calm An Anxious Horse (I go into more detail on bonding).
So, what I did with Rudy was I lunged him first just for 5-10 minutes every time as soon as I brought him in before trying to work on any of the bridling stuff.
My Bridling Routine (Worked For Me After 4 1-Hr Sessions)
- Lunge for 5-10 minutes in his halter and let him canter a bit if he wants to
- Working on lowering head until he can lower it immediately
- Work on head shyness until I can touch his face with my hand and with a softbrush anywhere
- Work on opening the mouth until he opened his mouth with his head down
- Bridling! After having all the seperate parts working, I set myself up for success by using a stool so I could follow his head if he started to throw and wave it again (I’m only 5’6”), I put him at the back of the isle so that he couldn’t back up anywhere and if it was cold outside I would make sure the bit was warm. Usually by this point, the bridling part went very smoothly.
I should note that after the 4th session, I didn’t have any issues bridling Rudy again! I could bridle him in less than a minute.
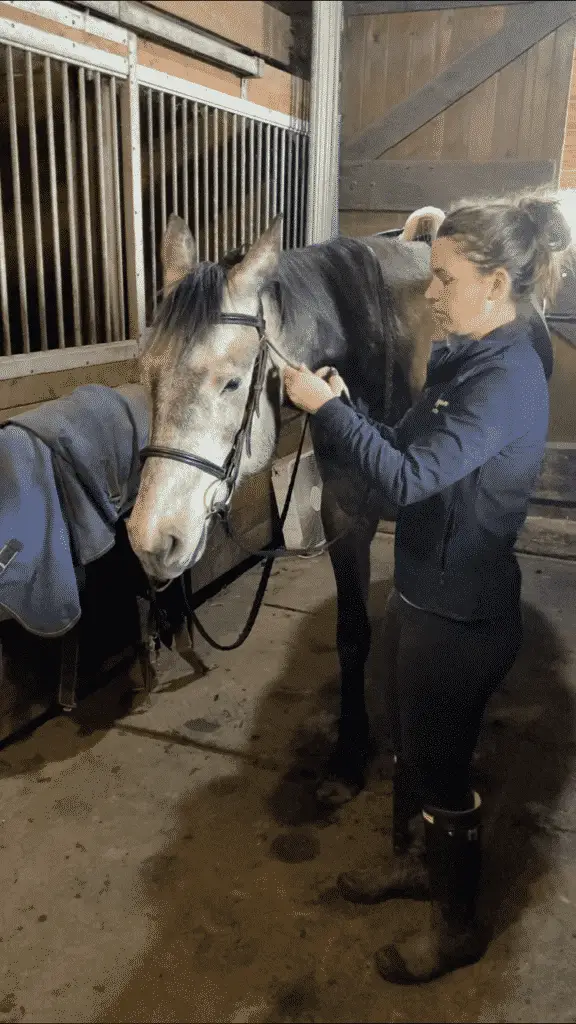
Update! Rudy Had An Ulcer!
Once I actually got my saddle (it took a while with Covid and it’s also a super nice saddle – you can read more about it here: How to Buy A Peter Horobin Saddle in North America) and started riding Rudy, I noticed that he would toss his head a lot whenever I would take and soften with the left rein.
I called the vet and it turns out that he needed his teeth done and he had a pretty good ulcer on the inside ride cheek. I’ll bet you anything this contributed significantly to why Rudy had learned he didn’t want the bit. Since I was doing everything on the ground with him, I don’t think it bothered him as much but once we started riding, I could immediately tell it was bothering him and he started to become testy about the bit again.
Moral of the story: make sure it’s not something physical!
Lessons Learned from Rudy in Week #1
I like to keep a log of the lessons that I learned each week from Rudy. Hopefully you’ll find them useful too!
- Don’t get frustrated. Remember that there are no expectations here – training is really just time with your horse and that in and of itself is the awesome part!
- Never be aggressive towards your horse, hit your horse or let other people be aggressive towards your horse.
- Always end on a positive note.
- If a problem seems too persistent, check for physical issues.
- Youtube does NOT have all the answers (haha)
Based on Week #1, I came up with a new plan for Week #2 where we mostly focus on bridling. Of course, half way through, I’ve had to alter the plan! As you might be able to tell my plans never last long with Rudy 🙂
Rudy’s New Training Plan For Week #2
1 hour/day for 4-5 Days/Week
Daily Plan:
- 5-10 minutes: Lunging
- 30-35 minutes: Grooming & Bridling
- 10 minutes: Free-Roam in the Arena/Rolling/Liberty
- 10 minutes: Leading & Exploring
Keep reading on for Week # 2 ->How Do You Deal With A Pushy Horse?
Other Posts About Rudy’s Training Journey You Might Enjoy…
- Building A Young Horse Training Plan for Rudy
- Week #2: How Do You Deal With A Pushy Horse?
- Week #3: [Coming Soon!]
Happy riding,
Martina
Like this post? Why not share it: