One of the tasks all horse riders dread (but that’s really vital) is cleaning their riding tack. It’s not glamorous, takes time, and means you can’t ride for a day or two while you disassemble your riding tack. It’s such a pain that professional riders often have groomers who actually do the cleaning for them, while some amateur riders use cleaning services that clean and repair riding tack for a fee.
Knowing how to clean your own riding tack is an important part of being an equestrian, even if you are only a casual rider or happy hacker.
Find out all the best ways to clean your riding tack right here, and get some handy tips to make the job much easier too!
RELATED: The Ultimate Guide to Cleaning a Saddle
Basic Tack (and How to Clean Each Type)
Not all horse riding tack is made equal, and riding tack is also made from many different materials (and combinations of materials) that require their own cleaning method.
I’ve got you covered with the best advice and helpful hints on how to clean your riding tack, no matter the material it’s made from.
(By the way, if you’re a newbie and are still wondering what tack even is, check out this guide! And here’s a guide to help you buy tack for the first time.)
Leather Tack: Saddles and Bridles
Traditionally, all riding tack was made from leathers of various kinds, from rawhide to polished hide, tooled leather, and more. Leather can be woven, braided, tooled, nailed, and edged.
You will find leather tack on bridles, stirrup leathers, and saddles. Even girths and fenders can be made from leather.
Cleaning leather tack requires that you first clean, then condition, and finally, wipe down or buff the tack.
To clean leather tack, you should:
- Start by disassembling the tack, removing the metal sections like bits, buckles, and irons that are not permanent fixtures on the leather goods.
- Clean the leather with a sponge soaked in leather cleaner or saddle soap. (You can either use a liquid or a hard soap, like Fiebing’s.)
- Use a stiff bristled brush and some elbow juice to clean off any grime, sweat, mud, dust, or particles from the leather.
- Pay special attention to the stitching areas, around the punched holes for adjustments, and folded sleeves.
- Finish with a dry cloth for wipe-down.
To condition leather tack, you should:
- Spray or wipe a good quality leather conditioner over the leather, rubbing it into the leather with a dry cloth or soft bristled brush.
- Give the leather tack some time to absorb the conditioner, and if necessary, you can apply a second coat of conditioner.
To finish and buff the leather tack:
- Use dry lint-free cloth to polish up the leather and remove any excess leather oil that can lead to a slippery saddle or reins.
- Check the leather tack for signs of leather perish such as dry rot, cracks, or nicks. Assess whether these are of critical nature, indicating the section needs to be replaced or repaired.
Reassemble your leather tack, dressing saddles, and bridles. Ensure the tack is stored in a dry place so it isn’t exposed to excessive dust or heat.
Leather Cleaning Products I Like:
To clean leather tack, it’s vital to use the best quality products that won’t leave a sticky or oily residue. Leather is a living “textile,” which means it needs to be fed with good quality oils or balms. Here are two of my absolute favorite leather cleaning and nourishing products:
1. Fiebings Glycerine Saddle Soap Spray

This soap spray has none of the soapiness you’d expect, but all of the cleaning power. Plus, it really nourishes the leather too.
Pros
- Comes in a handy spray bottle for easy cleaning
- Used for cleaning and to preserve, nourishment, and buff leather goods
- Great price at $7.49 for 16 fluid ounces
Cons
- The large spray bottle tends to waste some of the cleaner when cleaning smaller surfaces
- Luckily, the small bottle is great for decanting saddle soap spray
You can find a full review on Fiebing’s here.
Buy on Stateline Tack | Buy on Amazon
2. Oakwood Leather Conditioner
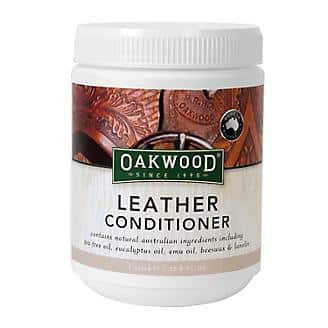
If your saddle needs that extra conditioner, or if you want to simply proactively protect the leather from environmental damage, you can’t go wrong with this great conditioning balm. Apply after cleaning, or use it to touch up saddles and tack between cleaning as part of your daily routine.
Pros
- Ideal for vintage saddles that need extra TLC
- Contains Australian natural ingredients like tea tree oil and eucalyptus oil, emu oil, and beeswax as well as lanolin
- Rich creamy formula that minimizes wastage
- No transfer to clothes when correctly absorbed
- Fair price at $9.74 for 4.2 ounces
Cons
- In cold conditions, the cream may not absorb instantly, so heating is required
Buy on Stateline Tack | Buy on Amazon
Synthetic Leather Tack: Saddles and Bridles
With the different types of saddles on the market, it’s no wonder that new and innovative materials are also being used, which has given rise to the revolution of synthetic saddles. Brands like Wintec and Collegiate have dominated the market, and these synthetic saddles require a different approach to cleaning.
Synthetic saddles, bridles, and other tack can be washed. That said, you wouldn’t want to soak these saddles as the padding that makes up the saddle seats could become wet. Wet padding + time = mold, so be warned.
However, cleaning a synthetic saddle is much quicker and easier than a leather saddle. Simply follow these steps:
- Remove any stirrup irons or girths.
- Disassemble the bridle or saddle.
- Use mild soap and lukewarm water with a soft cloth to wipe and scrub any soiled spots.
- Rinse gently with clean water, but avoid soaking the tack.
- Wipe with a dry lint-free cloth.
- Allow it to fully air dry before assembling saddles or bridles. Don’t dry in the sun to prevent fading.
Pro Tip: If you have a suede-finished saddle or bridle, allow it to dry before using a clean body brush with soft bristles to brush up the synthetic pile for a neat-as-new finish. Special synthetic tack cleaners like the Wintec Saddle Cleaner are available for use if you wish to use something recommended by the manufacturer.
PVC Tack: Bridles
PVC is becoming a popular material for bridles, especially endurance bridles and sports bridles. These bridles come in a range of vibrant colors and designs. Cleaning them is easy, but take care not to soak as the inner core is usually a nylon webbing, which can become moldy if soaked and left in a cool spot where it can’t dry.
Cleaning the PVC bridle requires little effort, and you can use most mild detergents. To clean PVC bridles:
- Disassemble the bridle, removing the bit.
- Use a soft sponge and mild detergent, gently scrubbing the PVC surface and trying to avoid the areas where there is stitching.
- Wipe with a clean, damp cloth, removing any detergent or soapy foam.
- Reassemble the bridle for use.
Metal Work: Bits, Buckles, and Stirrup Irons
When it comes to the metal parts of your tack, it requires a little creativity to clean some of the buckles and trim that feature on saddles. For the most part, the metal parts of the saddle such as dee rings and studs won’t require special cleaning.
However, if you are showing, you can use a metal wipe such as Weiman Stainless Steel Cleaner Wipes, which is already infused with a cleaning solution that you can safely use to wipe studs and hardware.
For stirrup irons and bits, a more intensive cleaning is required. To maintain general cleanliness and the condition of these parts, always rinse off the bits after riding, and if you’ve gone through mud, clean your stirrup irons too, removing any mud or debris that may cling there.
Once a week, it’s a good idea to disassemble your bridle, clean your bridle, and at the same time, clean your bit by thoroughly scrubbing it with a nail brush and warm soapy water. Regular dishwashing liquid is a good choice. Dunk your stirrup irons while you’re at it, scrubbing these to remove any build-up.
Once clean, rinse and dry with a lint-free cloth. Allow to air-dry before you assemble your bridle or dress your saddle and attach your stirrup irons.
Tack Trim: Sheepskin, Fleece, and Cotton
Your riding tack also includes “soft” textile items such as saddle pads and half pads made from neoprene, sheepskin, fleece, and cotton. Depending on what type of material the item is made from, you can wash these and dry flat in the shade.
I’ve always had good luck with washing all my saddle pads in lukewarm water, giving it a light spin cycle in the washing machine, and drying flat in the shade. After the sheepskin pads are dry, I use a soft and clean body brush to give the pile a good brushing to soften the sheepskin texture. Using a nail brush is a good way to clean out the spiky side of your Velcro attachments.
In between the washing, I like to keep things clean, which also means I don’t have to wash as frequently (and my saddle pads aren’t as soiled and grimey as when I don’t do daily cleaning). After each ride, I use a dandy brush to clean the hair, grime, and sweat from the underside of my saddle pads, sheepskin pads, and neoprene pads.
For winter fluff, I like to use a handheld vacuum cleaner that I run over the surface to vacuum up any shedding hair and keep things neat. Surprisingly, it is not as big a chore as you may think to clean your riding tack after each ride, and the benefit is that you never have the dreaded “scrub till your fingers bleed” clean as you do when you allow things to get really gunky.
Helmets and Safety Gear
When I discovered that some riding helmets like the TuffRider Starter Riding Helmet come with detachable liners, I was in my seventh heaven. If you have a helmet with a non-detachable lining, you need to be creative to wash it, as helmets do get quite sweaty and smelly if not cleaned regularly.
For a full helmet wash, simply place your helmet inside a pillowcase. Wash on the shortest and gentlest of settings of your washing machine in cold water with a small amount of regular laundry detergent. If your helmet has diamante detail, you should consider wrapping a thin towel around the helmet before placing it inside the pillowcase.
I like to throw a couple of old towels in the wash with the helmet to minimize it banging around in the machine. Air-dry flat in the shade.
When cleaning safety gear, it’s always advisable to follow your manufacturer’s instructions. Some padded vests are washable, while others can only be wiped with a damp cloth. Airing out vests after each ride will help limit body odor in the vests.
I have found that if I work really carefully, I can hand wash my air vest, though this is always a risk as you need to ensure no moisture gets into the mechanism where the pressurized canisters go or in the inflatable bags inside the vest. Most air vest manufacturers have a cleaning service where the vest is checked and cleaned for a fee.
Cleaning Horse Riding Tack FAQs
How often should I clean my horse riding tack?
Your riding tack should receive a light cleaning after each ride, which includes basic cleaning steps like wiping down sweaty bridles, rinsing bits, and wiping off any mud or water.
If you ride regularly or more than twice a week, you should set aside a day to clean your tack and oil it once a month.
If the weather has been poor and your saddle becomes wet or was exposed to a lot of heat, you should immediately dry your saddle, then clean and oil it to ensure the leather is protected.
What is the purpose of cleaning horse riding tack?
Clean your horse riding tack, including saddles, bridles, stirrup leathers, stirrup irons, bits, and saddle pads to ensure the equipment remains in the best possible condition, lasts, and to check for signs of damage.
There is nothing worse than having a saddle become uncomfortable because water damage has twisted the leather or having a stirrup leather snap mid-canter because of a crack.
Final Thoughts on Tack Cleaning
Clean tack is always a joy for rider and horse. I’ve seen my horses pull faces when I tack up with a saddle pad that’s seen sweaty use from another horse the previous day. Cleaning your tack ensures everything works well, there are no hidden wear and tear signs you would have missed, and keeps you and your horse looking smart while being comfortable too.
If you want to keep your tack neat, check out my detailed guide with 25 ideas on how to organize your tack room.
Like this post? Save it on Pinterest. Follow me on Pinterest.