You may be a new rider with their first horse who doesn’t know how to tack a horse, or perhaps you’re an English rider who’s getting into Western riding. Either way, saddling your horse Western-style, requires some skill and know-how.
Learn everything about saddling your horse for Western riding right here, from placing the saddle pad, swinging the Western saddle, and how to cinch up the girth and bucking strap to correctly fit the Western-style bridle.
Western Riding Equipment Checklist
There are a few tack items that make for a Western riding horse’s tack. Here’s what you’ll need:
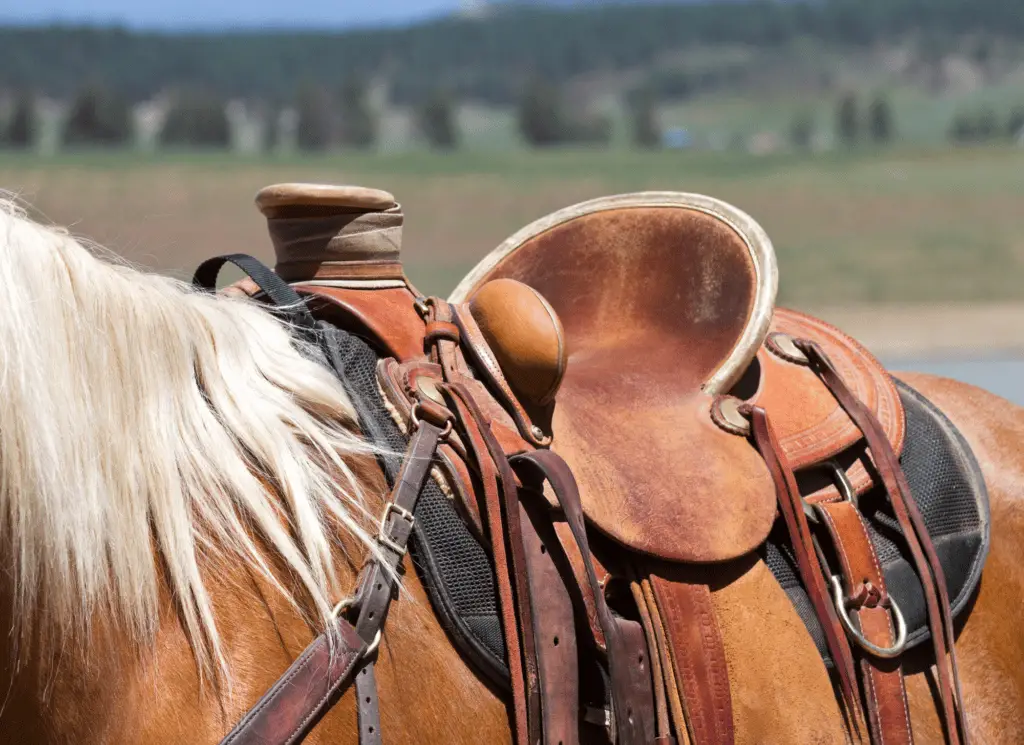
- A Western saddle that is properly fitted for your horse, with Western stirrups, fenders, stirrup irons, breast strap, and appropriate heart girth (front cinch) and buck straps or back cinch if your saddle has this
- A Western saddle pad
- A Western bridle that is fitted for your horse’s head with their bit
- A riding helmet to keep you safe
5 Steps How to Tack up a Horse Western Style
Always start by brushing your horse’s body to ensure there is no dirt or debris that can poke or rub them beneath the saddle or leather straps of the saddle. It’s also a great idea to use fly repellent spray to keep biting insects away when you saddle and when riding.
You can tie your horse to the hitching post with a halter and lead rope using a slip knot, or you can tie your horse in cross ties if they are fidgety when saddling or if they bite when being cinched.
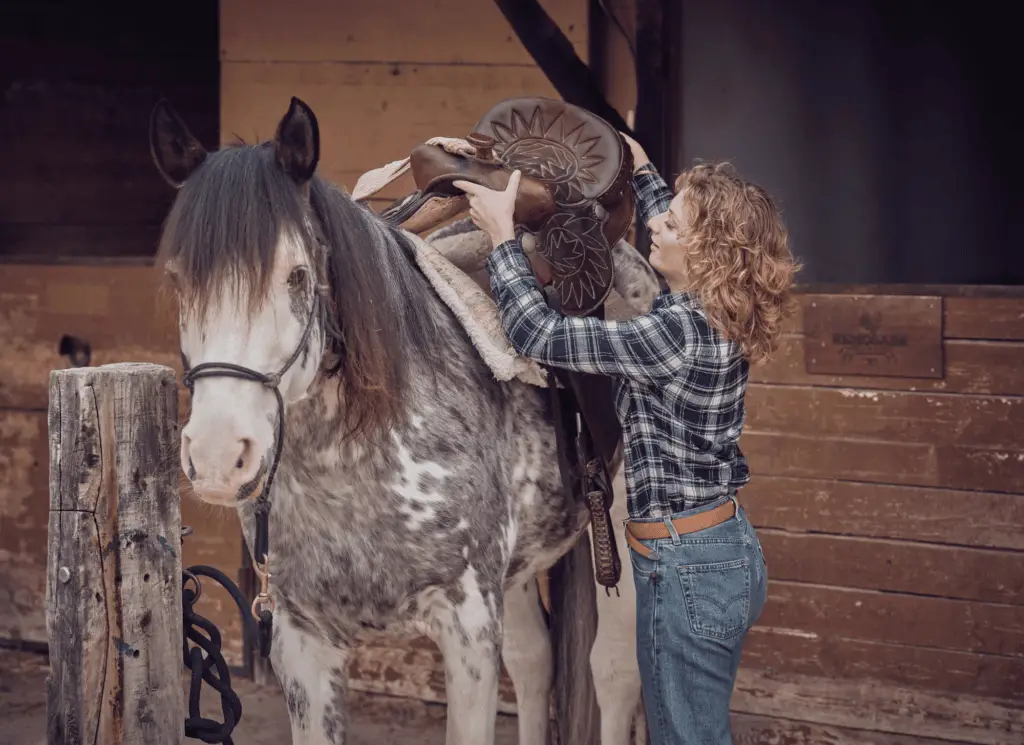
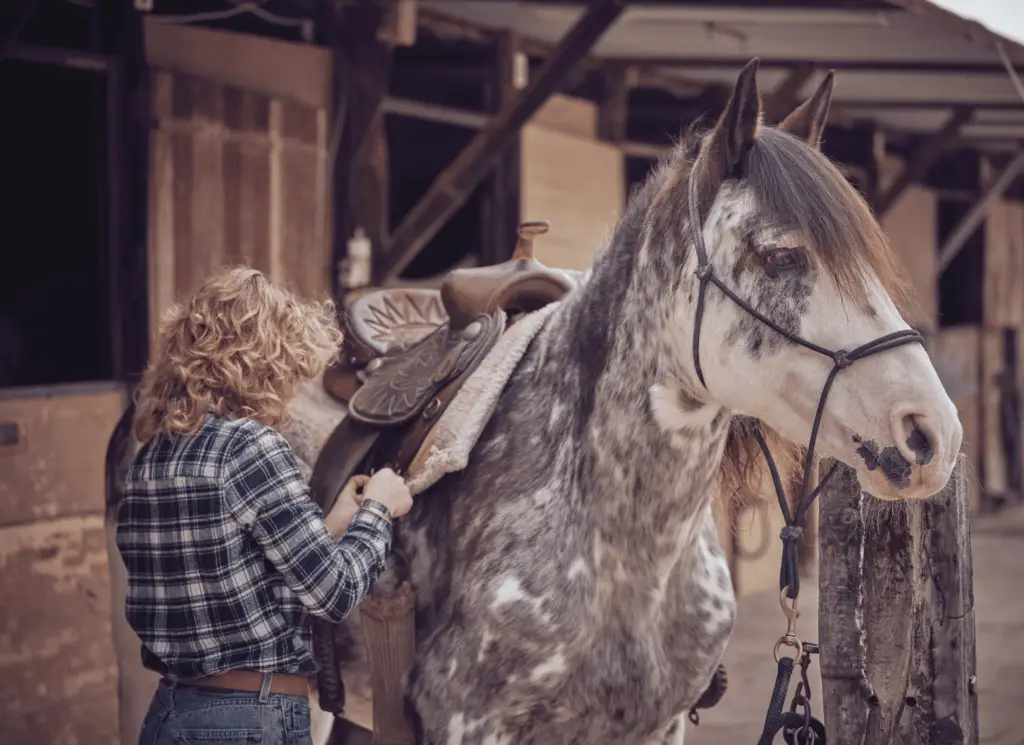
1. Placing the Saddle Pad
When you are happy your horse is clean and dirt-free, you can place the saddle pad on the horse’s back. Stand on the same side as your riding tack to help make things easier, which should always be the horse’s left side.
Place the pad slightly forward over the withers. Then press gently on the pad and slide it back until it rests in the natural curve of the horse’s spine. Always move saddles and saddle pads in the same direction as the horse’s hair to avoid pinching and pulling. Pull any loose hair from the mane out from under the saddle pad.
Top Tip: Western riders often travel through rough brush, so before you ride, double check your saddle pad for burs and thorns that may have worked into the saddle pad’s fibers.
2. Swinging the Western Saddle
Western saddles tend to be much heavier than an English saddle, which is why we always see cowboys swing their saddles over their horse’s back instead of just placing it down. To swing the saddle successfully, you need to prepare the saddle.
Start by looping the far side stirrup iron over the saddle horn. Likewise, attach the breast collar to the far side D-ring and secure the belly strap and near side leather strap to the horn. Remove the latigo or tie it up on the near side so it doesn’t slap your horse when the saddle swings over.
Loop the heart girth across the saddle seat. If your saddle has a rear cinch, you can secure this too.
Now take the saddle by the horn, face toward your horse’s rear or rump, swing the saddle slightly away from your horse, and then swing it over your horse’s back. When the saddle reaches a position above the horse’s spine, gently lower it into place.
Move around to the far side of the horse, checking that all the straps are placed where they belong with no straps pinched under the saddle or saddle pad. Lower the far side stirrup iron and cinch, and let the cinch dangle.
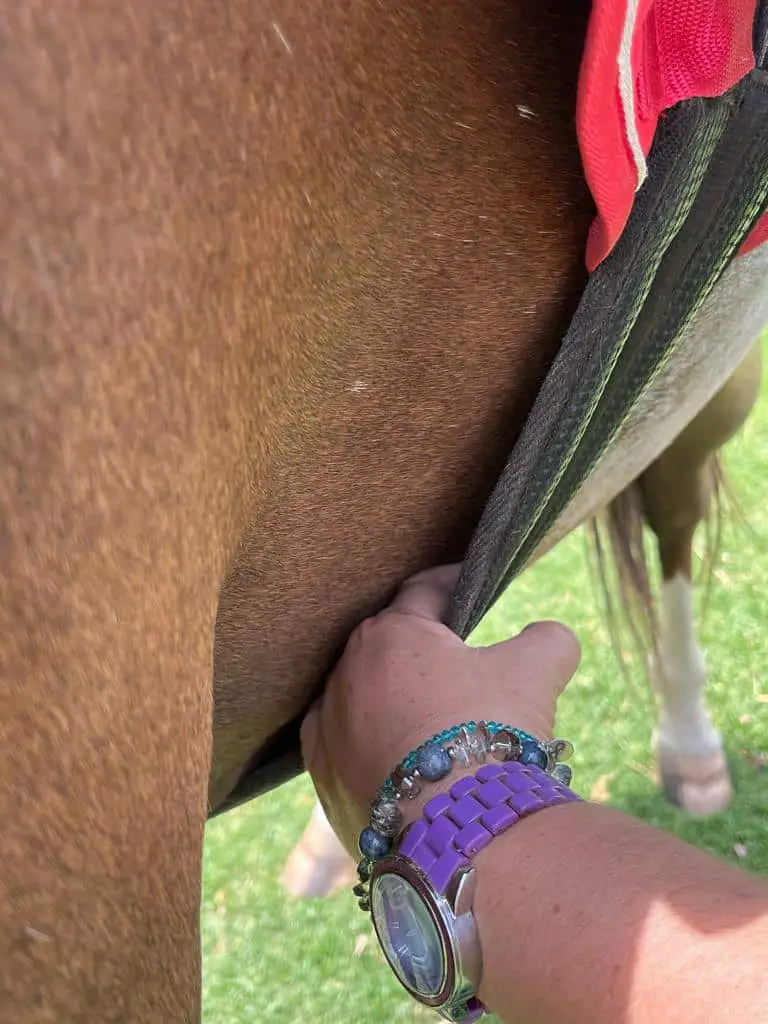
Step back around to the near side, and bending under your horse’s barrel, take hold of the front cinch. Thread the latigo through the near side D-ring and then through the large D-ring on the heart girth.
Take care not to over-tighten the latigo when you start cinching up the saddle. Instead, thread and tighten, then thread and tighten in incremental steps, tightening the saddle gently. When the girth fits securely and the latigo has been threaded sufficiently, you can tie the excess latigo like you tie a school tie.
Top Tip: If you are short, your Western saddle may be a challenge to get onto a tall horse’s back. Luckily, you can use momentum to help you get the saddle on the horse. Ensure there are no loose bits of tack that can fall off, and secure the stirrup on your nearside and also the cinch before you start.
Now, grab the saddle by the saddle horn and face slightly back toward the horse’s hindquarters. When you swing the saddle, swing it slightly away from the horse first, then reverse the swing and also twist your shoulders and hips, letting momentum carry the saddle over the horse’s back.
Use enough force when the saddle lands to soften the impact on the horse’s back and prevent the horse feeling uncomfortable.
3. Tying the Excess Latigo
Tying the latigo can seem like a mystery when you’ve only ever ridden English style. It’s quite easy though.
Simply finish tightening the latigo in place, taking up the excess until the saddle is fully fitted. As with the English saddle, you should still be able to insert four fingers between the cinch and the horse’s barrel. Now, run the latigo excess through the D-ring on the near side of the saddle.
Once through the D-ring, the latigo turns to the left, then folds over the D-ring to the right. Slip the latigo through the back of the D-ring to come out at the front, then tuck it behind the leather cuff to create a “tie” that hangs downward.
Top Tip: I like to use a simple rhyme to help my students remember how to fasten the latigo. After looping the latigo through the cinch, simply remember that you keep looping and tightening until you get to the tying part.
“The fox chases the rabbit into the hole and to the left. The clever rabbit swings to the right, around the tree, and back into the hole before ducking under the branch and running free out the front.“
4. Fastening the Breast Collar
To fasten the breast collar, move to the far side of the horse where the breast collar is tied to the saddle. Unhook the metal clasp that fastens to the near side of the horse and also the clasp that secures the bottom of the T-strap to the cinch.
Move around the front of the horse and fasten the other shoulder’s metal clasp to the D-ring on the near side of the horse’s saddle.
Next, carefully reach under the horse’s chest and take the bottom of the T-strap with your right hand. Secure the metal clasp to the D-ring on the cinch. Some breast collars have an additional over-strap that stretches from the far side over the horse’s neck to the near side and also fastens to the D-rings of the saddle.
The advantage of a breast collar is that these help distribute the rider’s weight more evenly when mounting from the ground. Over rough terrain, the breast collar helps the saddle stay in place and not slide forward. Any excess movement on the saddle can cause saddle sores.
5. Fitting the Western Bridle
How your horse has been trained will influence the way in which you fit their Western bridle.
If your horse has been trained to “honor tie” with their reins trailing on the ground and they stand, you can simply drop the reins and proceed with their headstall. However, if your horse needs to be tied to prevent them walking off, you should use a halter and slip knot to secure them to the hitching post.
Alternatively, tie your horse with cross ties.
Beginners may start at the front of the horse’s face because they don’t realize that horses are prey animals that instinctively duck away when something pounces on them. Instead, stand at the horse’s shoulder and face forward in the same direction as the horse’s muzzle.
If you use a halter or cross ties, it’s a good idea to slip the reins over the horse’s head to prevent them stepping on them. There are two ways you can slip the headstall over their head, and your choice will be determined by your height and your horse’s preference.
Method One: Up and Over the Horse’s Head
Holding your horse’s bridle by the headstall, place your right hand over the horse’s poll, gently encouraging them to lower their head as you raise the headstall upward with your left hand. Switch the bridle from the left to right hand, while your left hand guides the bit higher into the horse’s mouth.
Method Two: Over the Front of the Face
The second way to raise the headstall upward is to work under the horse’s jaw and over the front of their face or nose.
Slip your right hand under the horse’s jaw while holding the headstall by the cheek straps. Take the bridle in the same position with your right hand and gently place your hand over the horse’s nose to prevent head-raising behavior. Use your left hand to put the bit into the horse’s mouth.
Proceed to the next movement, which is to get the horse’s ears through the headstall’s ear loops.
Fastening the Horse’s Bridle
If your horse doesn’t like to accept the bit, you can use a thumb to gently stimulate mouthing at the corner of their mouth. Once they accept the bit, raise the headstall further to slip the ear loop over the horse’s ears.
Ensure the brow band is sitting comfortably over the bones of the horse’s forehead with two fingers being able to fit between the bones of their forehead and the band.
Next, tighten the throat latch into place, ensuring there is enough space between the looped latch and the horse’s jaw for four fingers to fit. Western bridles don’t have a nose band, so there’s no need to fasten one.
If your horse rides in a curbed bit, you will have to adjust and fit the curb chain or lip strap. Remember to rotate the curb chain until it forms a flat band before hooking it into the opposite bit hook. Again, you should be able to place two fingers between the horse’s chin and the chain when fastened.
Ensure the parts of the Western bridle fit comfortably on the pressure points of the nose, ears, and cheeks.
Bonus: Fitting Other Western Bridles
Western riders often use other types of bridles, such as the bosal and mecate reins or a hackamore bridle. These are fitted slightly differently, though the same principles apply.
Fitting a Bosal and Mecate Reins
As with a regular bridle, slide the reins over the horse’s head. Also, place the step-down lead over the horse’s neck. Slide the bosal over the horse’s muzzle, slipping the headstall over the horse’s ears.
Ensure the bosal is tipped so the bottom of the teardrop hangs perpendicular to the ground. If the bridle has a throat latch, fasten it in place with four finger space.
The area where the bosal is fixed to the cheek straps should rest two finger widths under the horse’s cheek bones. The top of the bosal should rest halfway between the tip of the horse’s muzzle and the cheekbones.
Fitting a Hackamore Bridle
A rope hackamore is fitted much like a rope halter, with the same rules applying to cheekbone clearance, but the throat latch is tied quite a bit tighter. Sliding two fingers between the rope and the horse’s jaw bone should be enough space.
Mechanical hackamores like the little S, wagon-wheels, and an English hackamore are fitted with the same space rules applying to the throat latch as a regular bridle.
The hackamore, which classes as a bit, should allow two fingers to be inserted between it and the horse’s face. Ensure the curb chain or lip strap rests in the groove under the horse’s chin.
Horse riding equipment can be mysterious, but with this guide and our guide on saddling for English riding, you can now saddle like a pro. Horses need to be comfortable when riding, so ensure your Western saddle and tack are properly fitted.
Once you can saddle and ride well, you may want to start learning about caring for your horse’s legs. Learning how to fit pillow wraps should be your next read.
Like this post? Save it on Pinterest. Follow me on Pinterest.