
You’ve finally reached the stage where the riding instructor has given you the green light to tack up a horse on your own.
It’s scary to suddenly have to place the saddle where it needs to go (not too far forward and not too far back), fit the bridle, and tie a million buckles that seem to make no sense, and then set the stirrups and girth and more… It’s quite overwhelming, right?
It doesn’t have to be.
Here’s the no-nonsense guide on how to correctly tack a horse for English riding, from ears to tail.
Horse Riding Equipment You Will Need to Tack Up a Horse in English Style
- An English saddle, fitted with stirrups and stirrup leathers
- A saddle pad that fits the shape of the saddle
- A padded, elasticated girth
- An English bridle with noseband and throat latch (the flash strap is optional)
- An English bit, such as a snaffle bit
Before you get started:
Check that your horse’s hooves are not overgrown or broken, as this can cause tripping when riding. Use a hoof pick to clean out their hooves.
Difficult horses should be saddled in cross ties to ensure your horse is under control. Never saddle a dirty horse as dirt can hide burs and thorns that may press under the saddle and cause your horse to bolt or buck.
Ensure you are saddling in a safe area where the horse won’t suddenly get a fright and take off with a saddle half tied to them. Avoid saddling near other horses that may interfere while you are saddling.
Wear comfortable footwear such as boots with reinforced toe caps to protect your toes. And it’s always advisable to ride with a riding helmet.
How to Tack Up a Horse for English Riding In 5 Steps
Develop good habits when tacking. It’s a good idea to have your English riding tack set out and fully “dressed,” meaning the saddle should be fitted with stirrup leathers, irons, and girth. The bridle should be fully assembled with the bit and reins correctly fitted.
Have your horse tied to the hitching post with a webbed halter using slip knots and quick release snaps to tie your lead rope and stop them walking off while you are busy saddling.
Top Tip: Use a good quality insect repellent spray that’s safe for horses to keep flies and other biting insects away. Spray liberally before you start saddling, so your horse will be more inclined to stand patiently without swatting at you with their tail or stamping hooves.
You are now ready to tack up your horse!
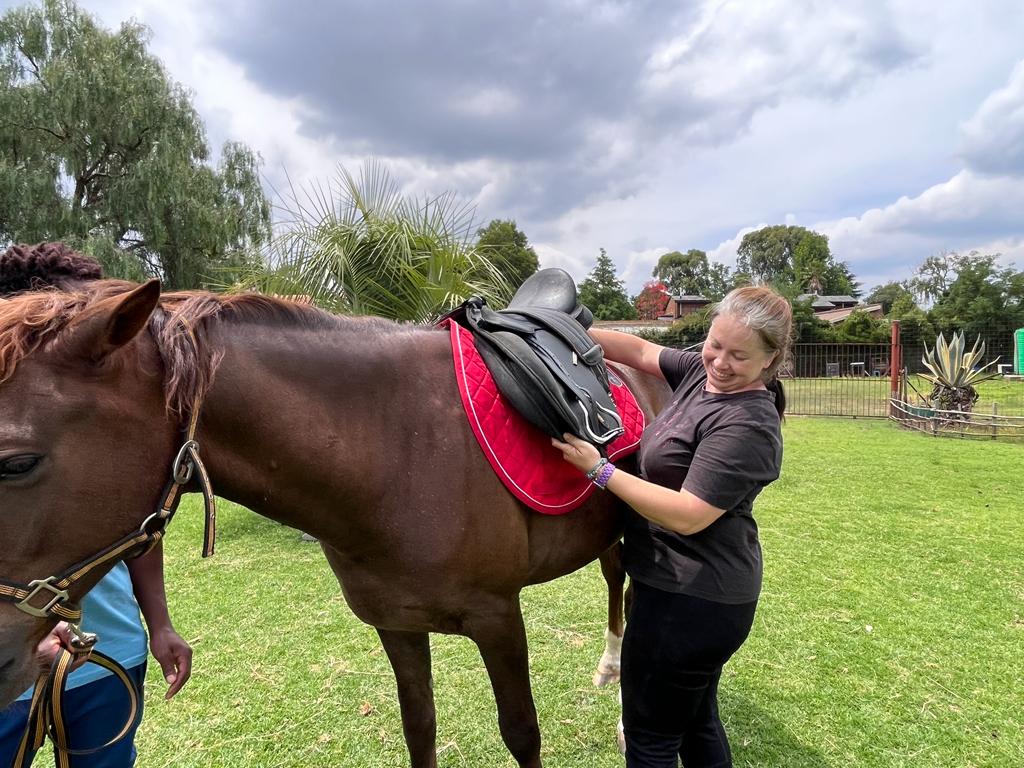
1. The Saddle Pad
In English riding, the saddle pad usually extends about an inch on either side of the saddle, unless you are riding dressage, in which case you’ll use a shaped saddle pad that follows the contours of your saddle.
The important thing about fitting the saddle pad is to check that it’s not too small for your saddle, doesn’t bunch up under the saddle or in the girth area, has a slip to insert the saddle billets through, and clears the spine and withers of the horse completely.
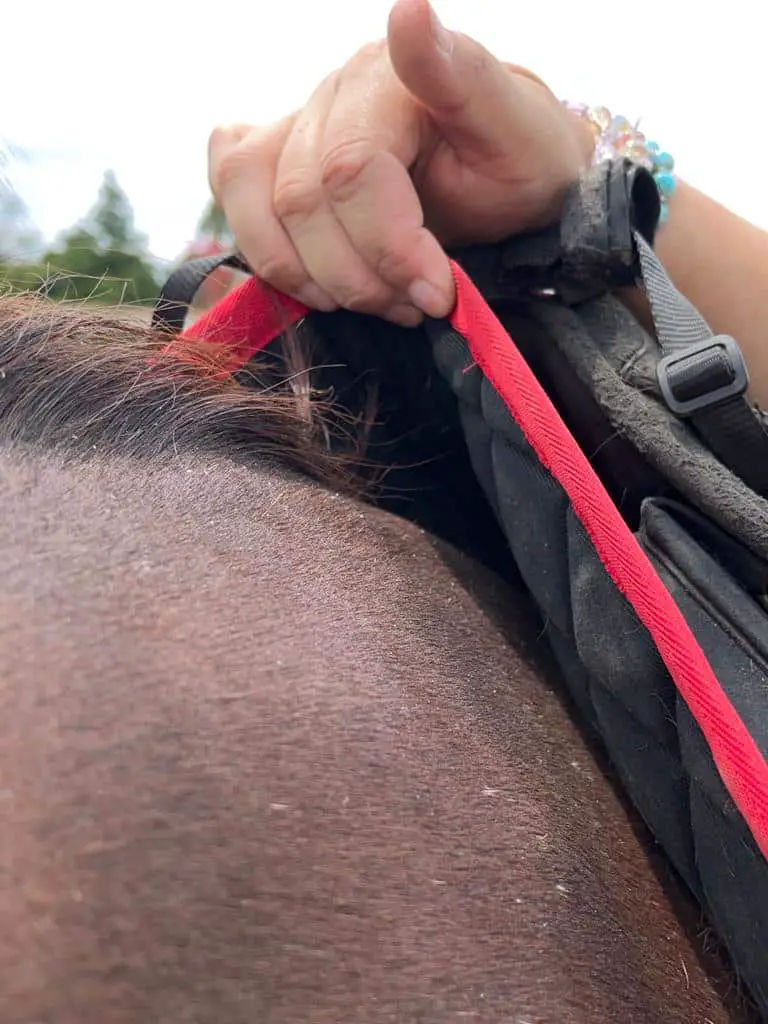
Place the saddle pad over the horse’s back with the rounded side facing forward or the long sides closest to the shoulder. Pull any loose hair from the horse’s mane from under the saddle pad before adding the saddle.
2. The English Saddle
Ensure your saddle is correctly checked for your horse’s back. No two horses are the same, and a saddle that fits poorly is like an athlete trying to run in shoes that are too big or too small. If the saddle rubs or pinches, your horse can develop saddle sores.
Sores, muscle bruising, and rubbing can create a host of problems, which take months to heal. So invest in a quality saddle and have someone with experience (or even a trained saddle fitter) check your horse’s saddle to ensure it fits them comfortably.
Ensure the stirrup leathers are run through the irons, with the irons resting against the seat of the saddle so they don’t fall down when you are swinging the saddle over the horse’s back. You may have the girth attached on one side or loosely laid over the saddle seat.
Set the saddle on the horse’s back, then move it slightly forward and backward to ensure it fits exactly where it naturally “hooks.” Perform a check to ensure you are not too far forward with the saddle (which will pinch the horse’s shoulders) by placing two fingers in front of the saddle skirt and checking that these two fingers aren’t resting on the horse’s shoulder too.
Next, check that the saddle is clear of the horse’s last ribs to avoid the saddle resting on their kidneys. Align the saddle so it is straight on the horse’s back. The girth (if attached) can easily pull the saddle over, causing the saddle to sit skew.
3. Girthing Up
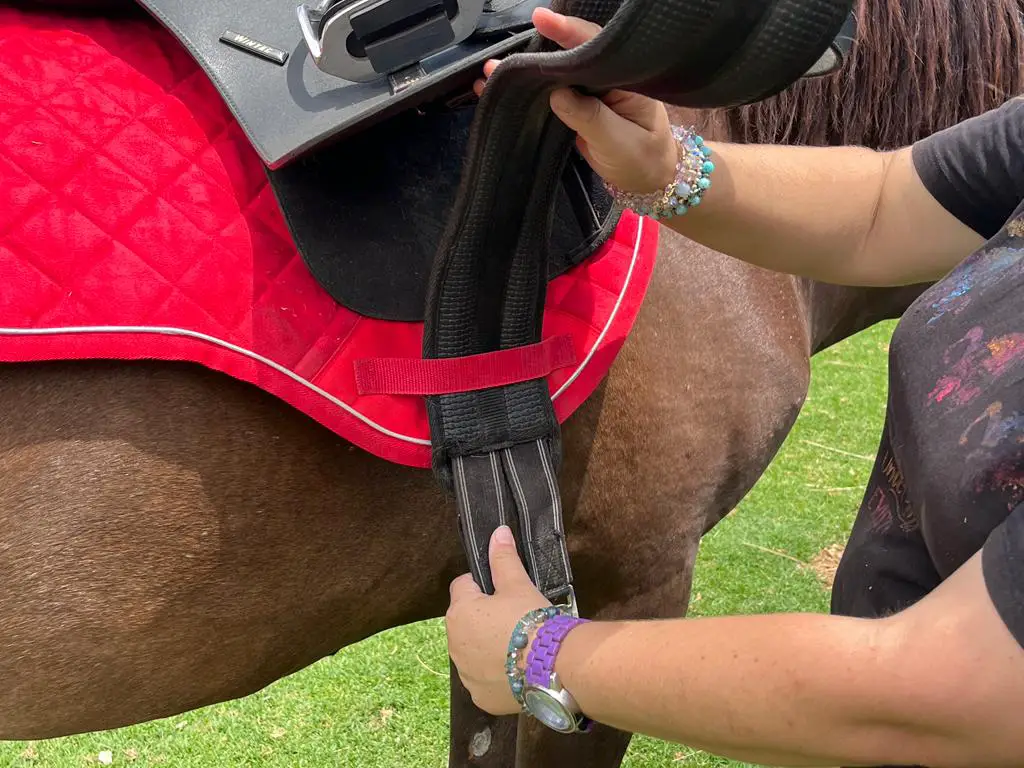
Now it’s time to girth up the saddle. Attach the girth to the far side billet straps of the saddle (if it’s not already attached). Pass the girth through the far side billet loop on the saddle pad.

When you prepare to tighten the girth, ensure you take hold of the saddle pad at the cantle and the pommel and pull it up to create a clear channel so the saddle pad and saddle don’t have contact with the horse’s spine or withers.
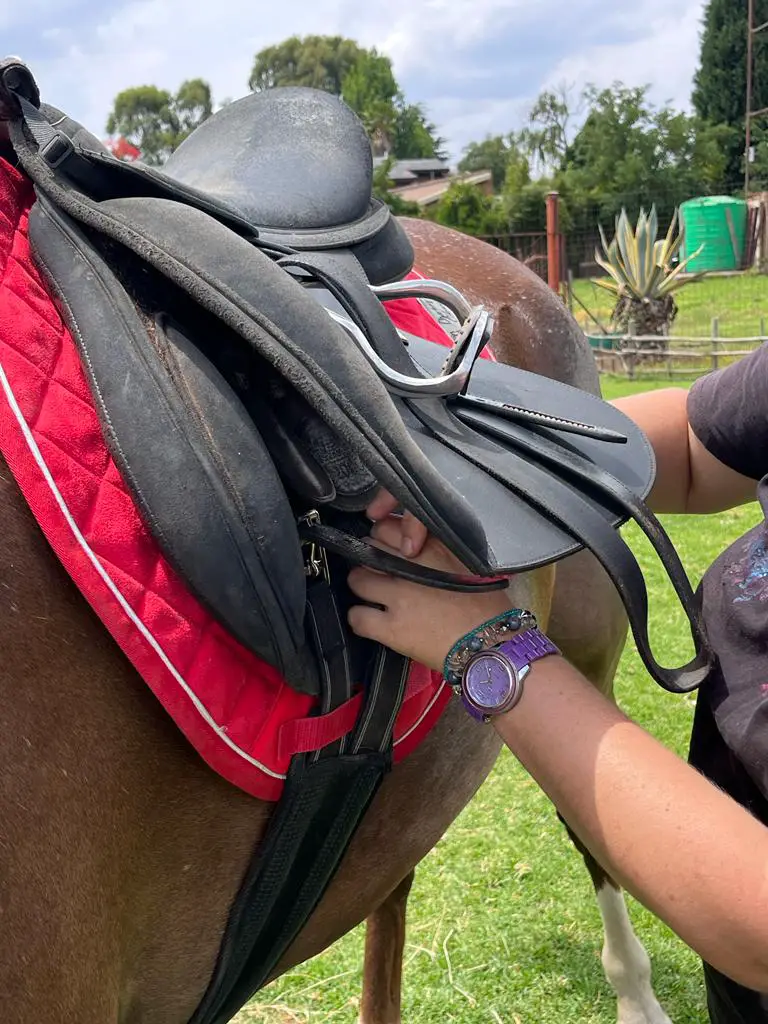
Now, tighten the girth equally, sliding up the last few billet holes one at a time. Don’t fasten the girth all the way. Only fasten the girth until it touches the bottom of the horse’s barrel.
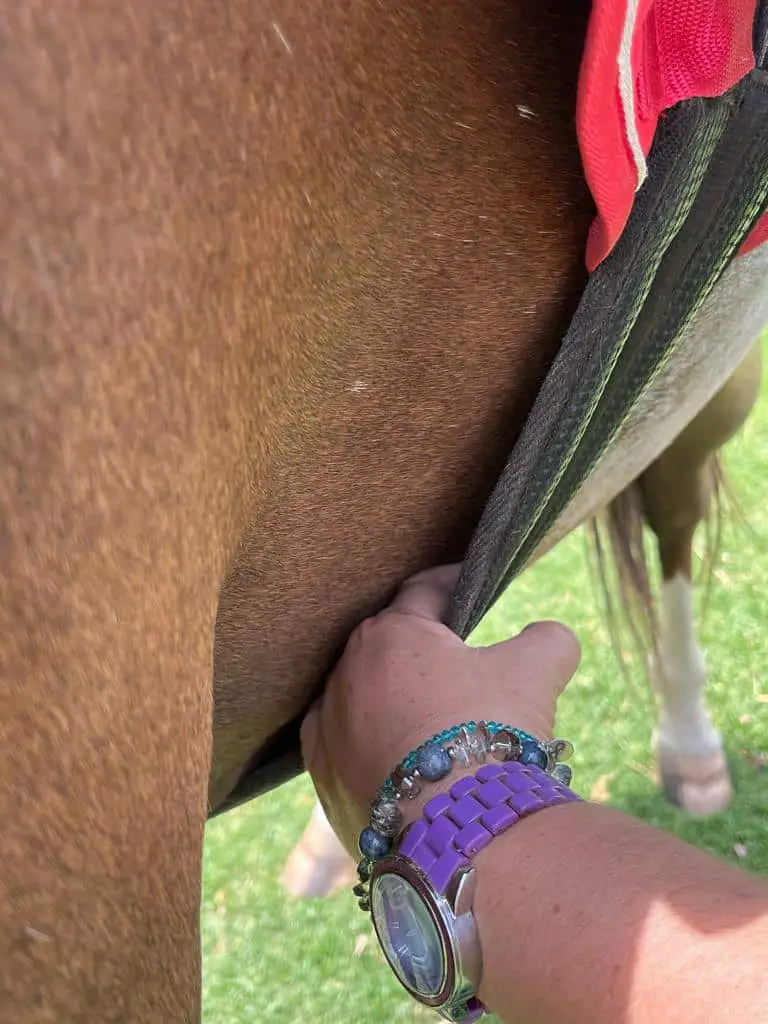
Step around to the front legs, gently asking the horse to extend one leg at a time while you stretch the leg and allow the skin to even out. If there is wrinkled skin under the girth, it will hurt the horse and can lead to bad behavior like bucking.
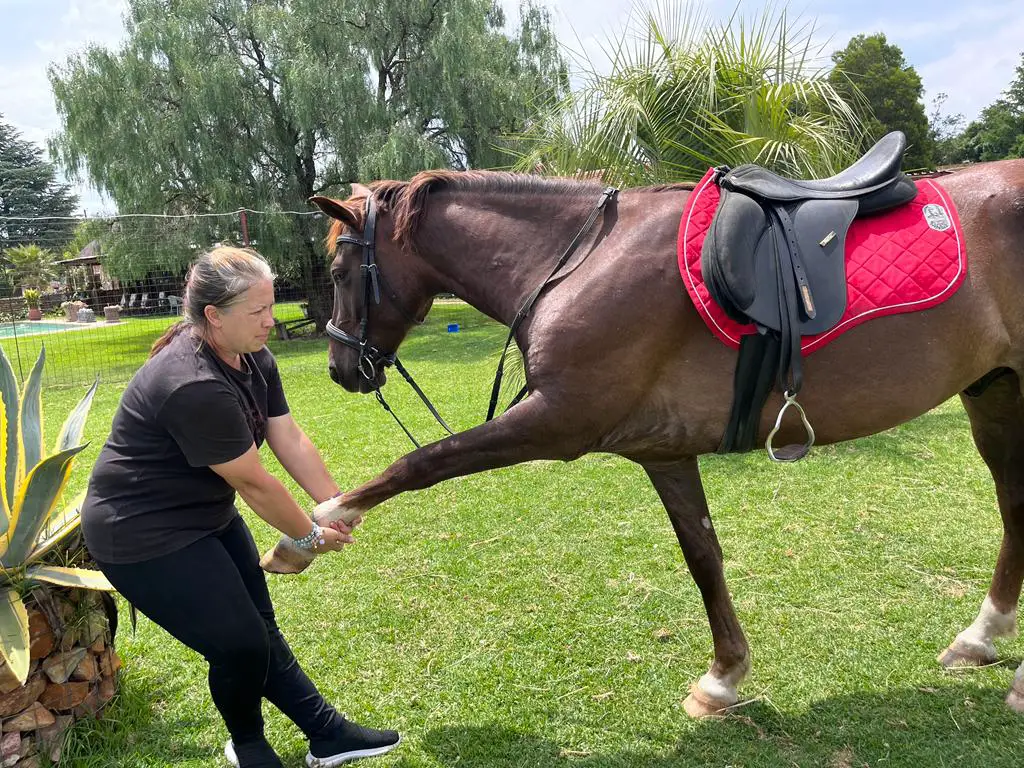
Once both front legs have been stretched, tighten the girth further until you can comfortably slide four fingers of your hand between the girth and the horse’s body. The girth is now tightened correctly. Tightening it more than this can create problems with the horse’s breathing and form painful girth sores.
Top Tip: An elasticated girth is a girth where one set of buckles is fitted to an elastic strap that allows for more flexibility while saddling. The elasticated girth can also be tightened more easily. However, resist the temptation to over-tighten the girth.
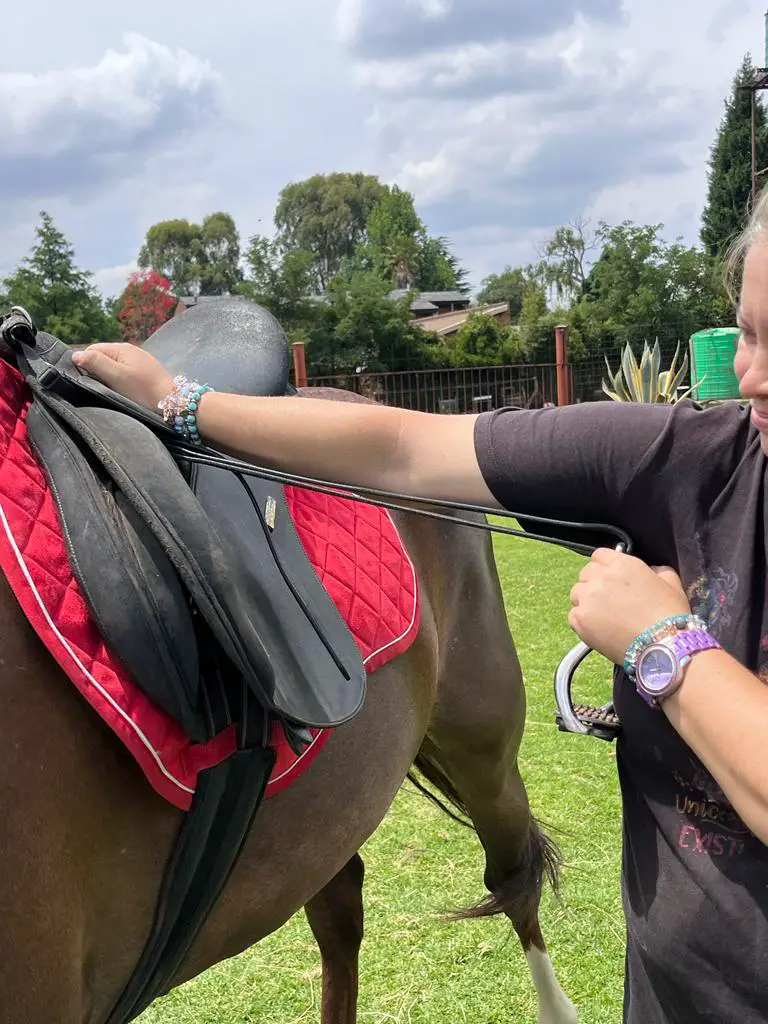
4. Last Minute Saddle Check
Now that the saddle is strapped to the horse, it’s a great idea to do a final check before you fit the bridle.
Start by checking the stirrup leathers. Ensure the leathers are correctly slid through the quick release hooks that most English saddles come with. These hooks can be shaped or have a small mechanism that pops down if you fall and get a stirrup twisted. In the open position, the stirrup leathers will detach from the saddle, freeing your leg if you’ve fallen off.
If your saddle has safety releases with small hinged mechanisms, you should check that these mechanisms work without strain. Wear and dampness can cause these types of quick-release mechanisms to seize up and get stuck. A little WD40 will sort out any rusting.
The stirrup leathers should have the stirrup irons attached, and when you run the stirrups down into the riding position, your hand should hold the top of the stirrup arch in your armpit, while the hand on that side rests on the saddle seat. This is approximately the length of your legs when riding.
Some riders prefer shorter stirrups when jumping, while dressage riders prefer a longer stirrup length. For general riding and hacking, the length of your arm should be adequate.
Top Tip: When you are mounted on the horse, your ankle bone should hang level with the stirrup bar if your leg hangs freely off the side.
5. Fitting the Bridle
Ensure the stirrup irons are folded up across the seat or loop the stirrup leathers through the irons to prevent them banging on the horse’s sides while you fit the bridle.
Now take the bridle in your right hand. Stand on your horse’s left side. Most horses prefer riders on their left side as they are accustomed to the rider mounting from the left side.
I prefer to slide the reins over the horse’s neck before I loosen the halter. If the horse decides to back off, I can still maintain control. Stand facing the same side as your horse. Ensure you turn your toes to the front too, as the horse may step sideways and end up landing on your toes. Good habits go a long way and keep you safe.
From this point, there are two ways to proceed when taking your horse:
Method #1: Under and Over (Great for Short Riders)
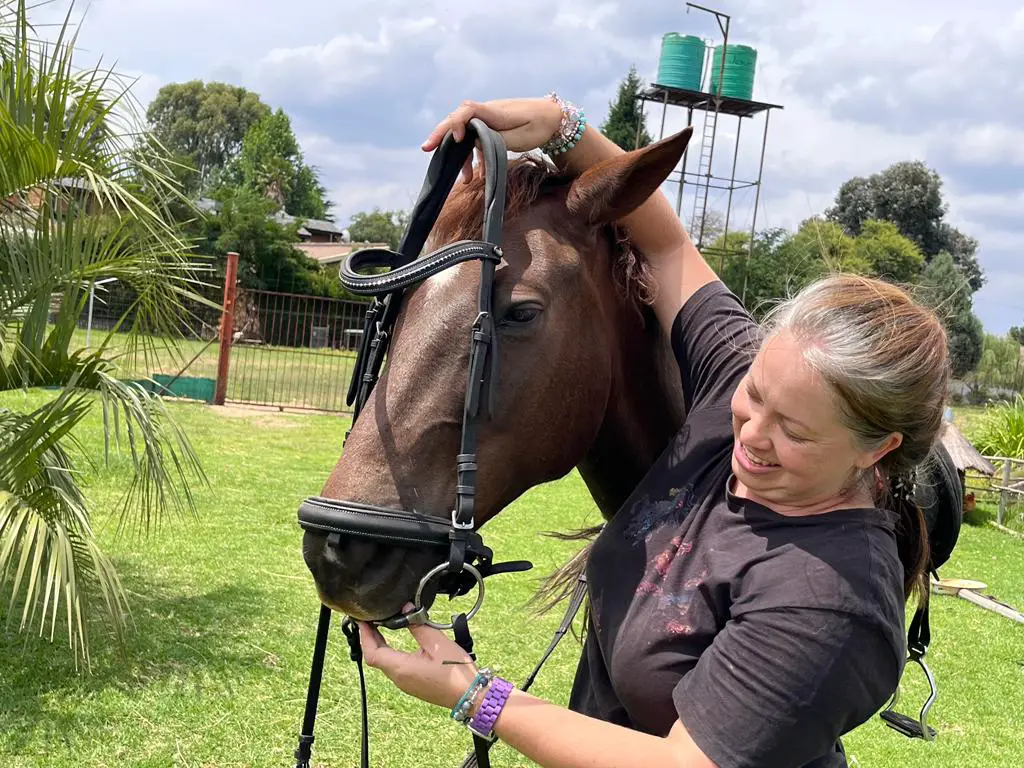
Take the bridle under the horse’s chin while holding the front of their face with your left hand in a gentle downward pressure.
Grip the bridle by the cheekpieces and pass the section your right hand is holding to the left hand while your right thumb slides into the corner of the horse’s mouth. When your horse opens their mouth, raise the bit with the right hand and gently place it in the horse’s mouth without banging their teeth.
Calmly pull the cheekpieces upward and take the bridle by the top of the headstall. Slip the near-side ear through the bridle and then the far-side ear.
Ensure you gently cushion the bulbs of the ears to prevent them banging or rubbing when the headstall slides over.
Method #2: Front and Over (Great for Tall Riders)
For the second method, hold the bridle by the headstall with your left hand. Raise the left hand in front of the horse’s face while also placing the right hand on the horse’s poll.
When the horse lowers their head, take the headstall with your right hand, while your left hand supports the bit and guides it into the horse’s mouth. Take care not to hit the horse’s teeth.
Use your left hand to guide the horse’s ears into the headstall by gently taking the near-side ear first, then slipping the far-side ear into the bridle.
From here, the bridle fastens the same way for either method.
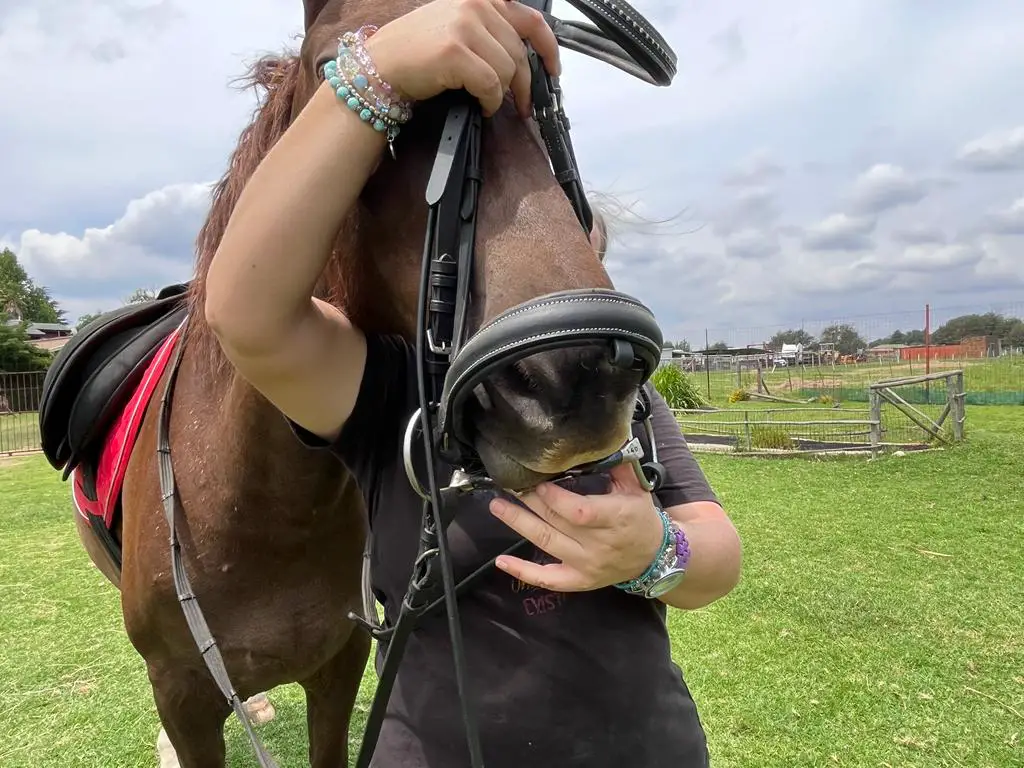
Fastening the Bridle
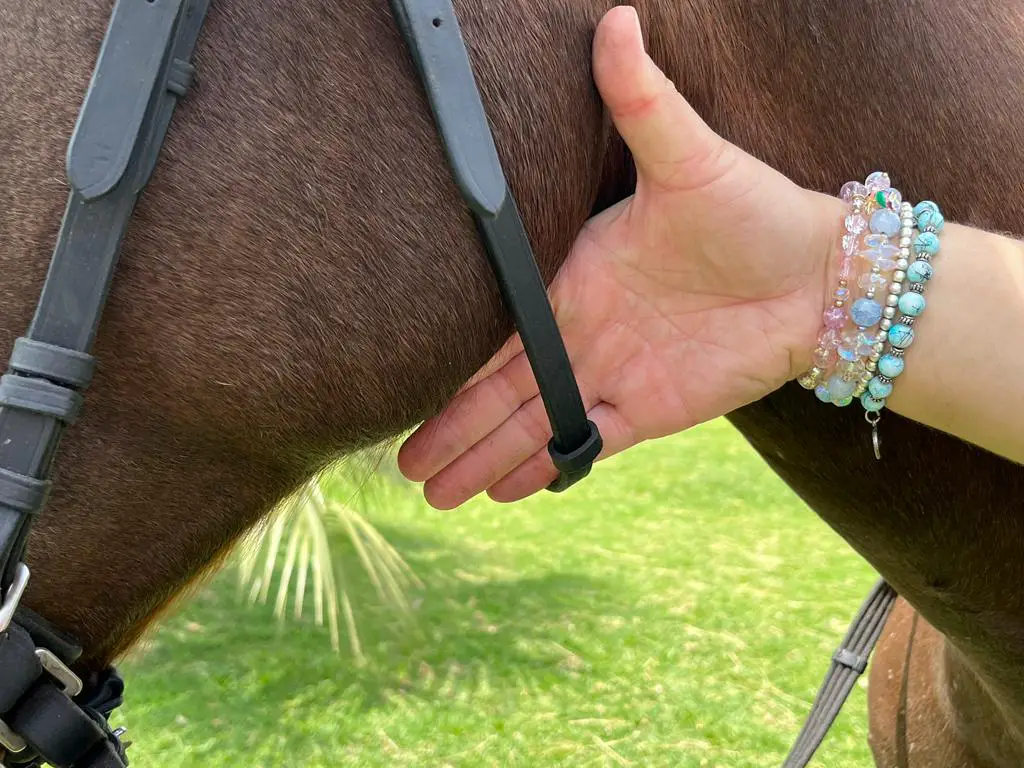
Start with the throat latch of the bridle. Raise it under the horse’s jaw and buckle the throat latch until it rests in a secure position at an angle that places the bottom of the throat latch in the natural cleft where the horse’s cheek starts on their jaw.
You can check this by inserting four fingers between the latch and your horse’s jaw:
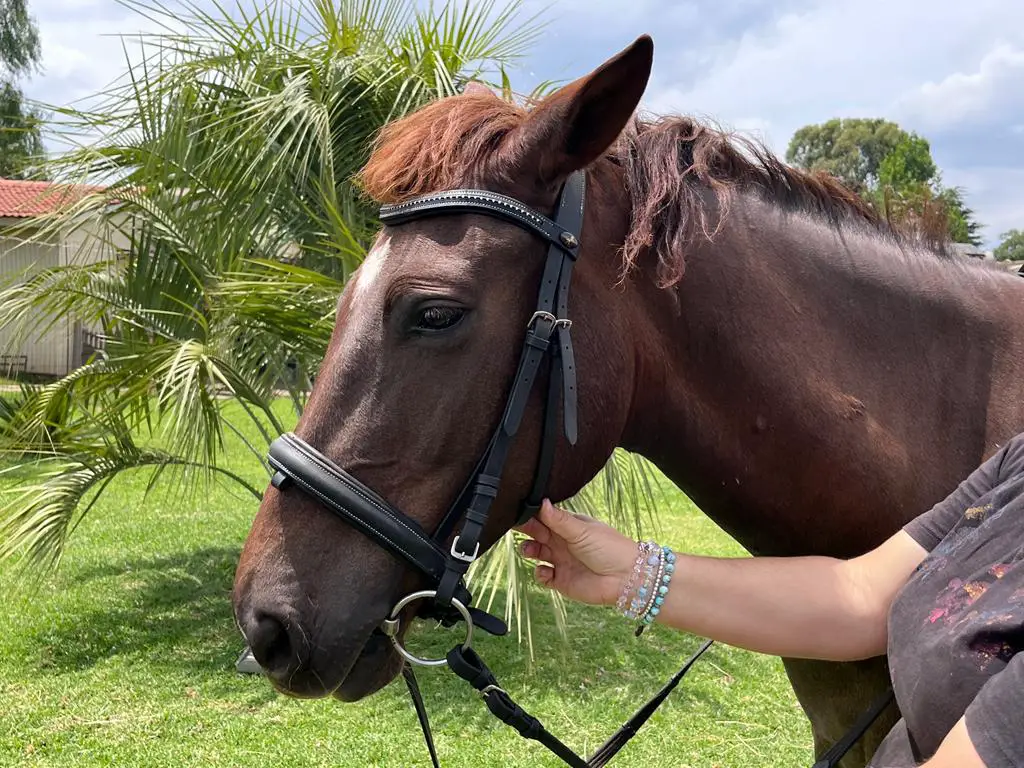
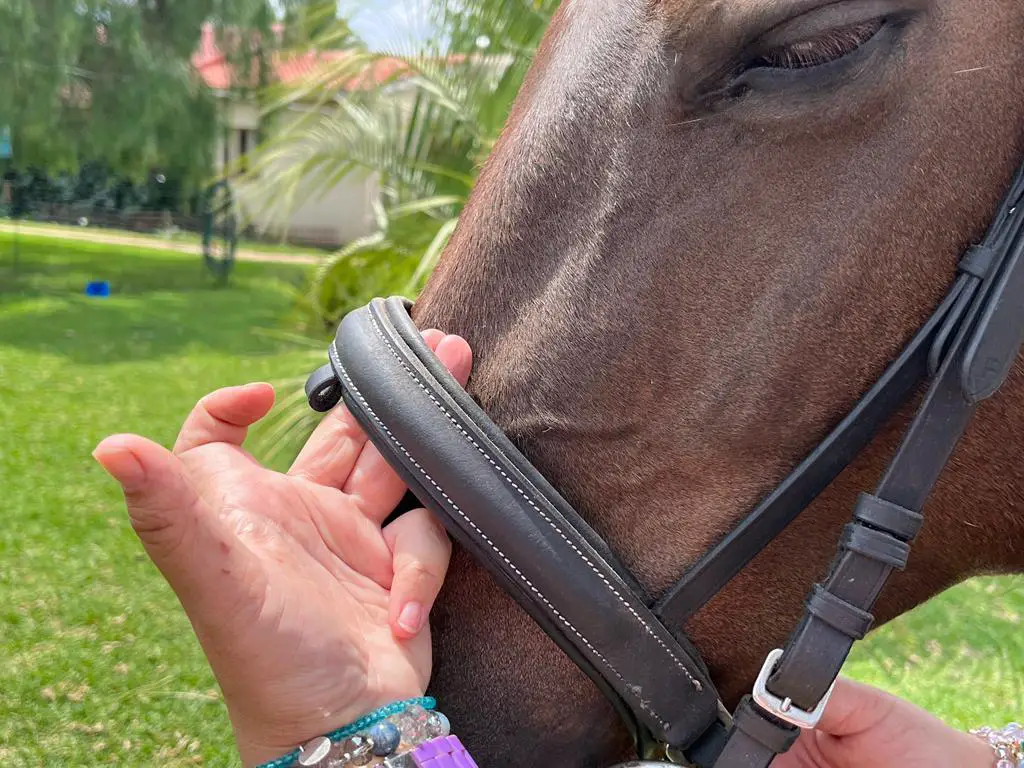
The nose band is next. Fasten the nose band until two fingers can comfortably slide between the band and your horse’s nose. Ensure the noseband fits at the recommended height on the face, but as a general rule, the nose band should sit two finger widths below the point of the horse’s cheekbone.
Check that the brow band allows two fingers to slip between the leather strap and your horse’s face. Tight brow bands can cause headaches and head shaking behavior. Ensure the reins are untangled and lie flat against the horse’s neck.
Finally, check that the bit is correctly placed in the horse’s mouth, the horse doesn’t have their tongue over the bit, and that the bit rests centered on the horse’s tongue. Lower your stirrup leathers and ensure the irons face forward without a twist in the leather strap.
You are now ready to go riding!
English Riding Tack Extras
When jumping, there may be a few extra tack pieces your horse requires, such as the three or five point breast collar that prevents the saddle sliding backward when the horse jumps.
To fit the breast plate, simply slide the neck strap over the horse’s head before adding the saddle. Place the bottom leather strap loop over the girth before tightening your girth. Then attach the metal clasp on either side of the horse to the d-rings on the saddle.
The Importance of Proper Tacking
Saddling your horse is not a chore; it’s a responsibility to your horse’s and your safety. A poorly fitted saddle can cause accidents while creating sores on your horse’s back. Likewise, having your bridle snap mid-canter is an experience few riders welcome.
Luckily, you’ve now got the ins and outs of tacking up correctly so they and you are comfortable and ready to enjoy your riding work.
Now add to your knowledge base with some great tips on tack cleaning with our guide on Tack Cleaning 101.