
Isn’t it just amazing to walk into the tack room at a high-end stud farm? Everything gleams and there are neat little cubicles with tack for each horse or rider. There are large custom-built wooden cabinets where drawers reveal neatly folded polo wraps and tendon boots.
Rows of brand-new-looking saddle pads hang on precision racks, ready for the next ride. Training aids are on a specially appointed rack, while medicine is kept in a special cabinet with a phone to call the equine vet if needed. It’s picture perfect… and costs more than I will probably make in a year!
How can you achieve a stunning tack room with a tight budget (or even no budget)? I set myself the task of making and decorating my tack room to the highest standard on a budget of only $150. Can I do it?
Let’s find out.
RELATED:
This article contains affiliate links, which means we may earn a commission if you make a purchase (at no extra cost to you). All recommendations are honest! Also, all pricing was correct at the time of publication, but obviously exact prices are subject to change.
Tack Room Checklist
To start, I wanted to have a checklist of all the things I desire in my tack room. I needed to know what I had to save money for and how I could cut corners. Here are the essentials that my tack room needs.
- Saddle racks x 3
- Saddle pads storage x 5
- Bridle hooks x 5
- Space for training gear
- Helmet hooks x 3
- Grooming equipment (brushes, combs, and hoof picks)
- Wash equipment (bucket, shampoo, sweat scraper, and sponge)
- Storage for medicine and first aid supplies
- Crops and whips
- Day sheets, fly sheets, and fly masks
- Horse boots and wraps
- Rider boots
- Halters x 5
- Trash bin
13+ Tack Room Ideas: How to Beat the Budget
Knowing what I needed to store in my tack room, it was time to find some amazing tack room ideas to make things happen without having to buy every single item.
Saddle Rack Ideas
Saddles are quite heavy, so you need to make sure they are secured and well supported. The easiest is to buy a saddle rack. While saddle racks can get pricey, there are some budget-friendly ones available, such as the Intrepid International Portable Wooden Saddle Rack. At only $26.13 each, they’re pretty affordable.
On my tight budget, I had to find some alternatives if I was going to afford three saddle racks (and other stuff for my tack room!) on a budget at way less than $150. Turning to DIY, I found some great ideas.
- DIY Bucket Saddle Rack
Screw a couple of buckets into the wall using heavy duty screws and large flat steel washers behind the screws’ heads. Not only is this ideal for resting a saddle on, but you can also put tack (such as extra stirrup leathers and tendon boots) inside the bucket.
Cover each saddle with its saddle cloth or saddle cover and you’ve got a neat saddle storage system. Plus, it doesn’t have to cost you anything as you can source plastic buckets for free from feed stores, painting specialists, and even from caterers (some large quantities of foods like pizza toppings come in these plastic buckets).

- Saddle hanger
How about making your own mobile saddle strap or hanger? You can also take the same strap to your car when you need to travel, keeping your saddle neat on the go. These saddle hangers are available online, but you can easily make your own with bits of broken tack and some ingenuity.
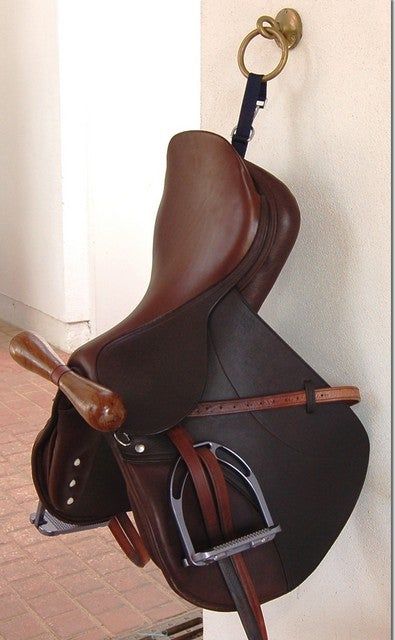
I used half of a set of reins (that got broken by a nosy gelding), a carabiner clip, and a lost stirrup iron. I ran the leather rein through the stirrup’s arch mount and the other end through the clip, and I had a nice T-hanger happening at no extra cost.
Using some bright string and decorative elements like feathers and beads, I created a stunning saddle holder. All I needed on the wall to hold these would be a couple of large eyelet expansion bolts (retailing at around just $2 each).
Obviously, I didn’t have three stirrups lying around, but I did have a bunch of old horseshoes. Using a set of the largest horseshoes I could find, I tied a thick cord to one end of the shoes and the other to a carabiner. The pommel of the saddle rests comfortably in the horseshoe, while the clip attaches to the eyelet bolts.
Total Cost: $20.94
- $7.95 for a pack of carabiners
- $12.99 for a pack of eyelet expansion bolts
Tip: Cover the wall behind the saddles with a soft sponge material or some conveyor belt to prevent the saddles scraping the wall.
Saddle Pads Storage Ideas
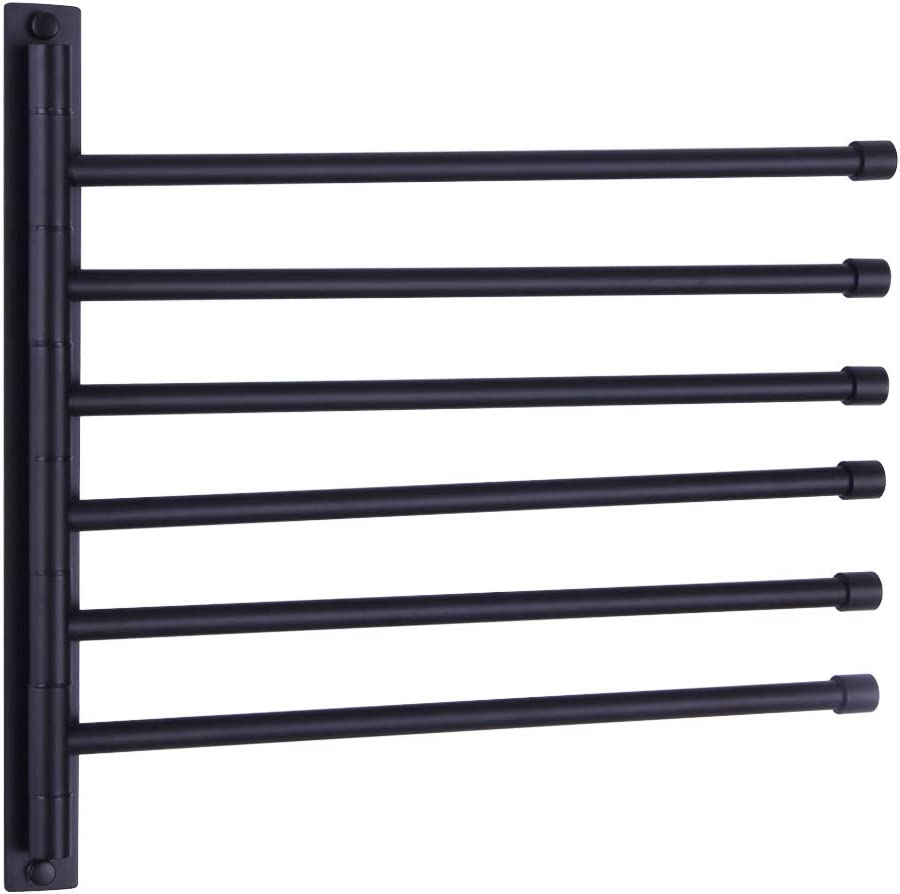
Next, I needed a way to store each of my saddle pads (I have several). A great idea is to buy a swinging towel rail such as the GERZWY Bathroom Swing Arm Towel Bars at $39.80, or you could also go for the authentic horsey saddle pad rails like the Equi Racks 5 Arm Wall Mount Blanket Pad Rack. But at $79.35 (for two of these towel bars), I wasn’t going to be able to afford it. Even $38.80 was a bit more than I wanted to spend. So I chose DIY again…
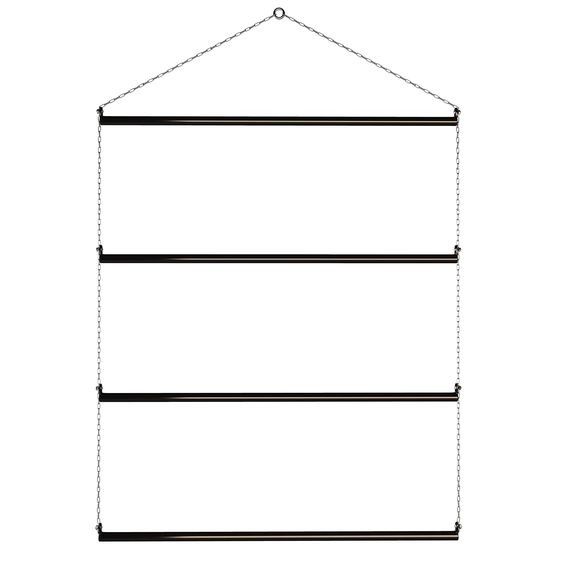
- DIY Saddle Blanket Rack
Hanging saddle pads and horse blankets from this rod system is ideal, but to make things even cheaper, I used a couple of old broom sticks, drilled holes in the ends, ran a cord through both sides, and tied them all up to a nice metal ring (leftovers from a broken halter).
For the saddle pads, I left a gap of 16 inches between each “rung” so I could easily slip the pads through. You could decrease the distance to fit more pads in. To hang horse blankets, I’d leave a gap of at least 2 inches, and I’d use a chain instead of cord or rope to ensure a stronger and more weight-bearing construction.
Total Cost: $12.95 ($12.95 for the rope)
Bridle Hooks
Bridle hooks need not cost an arm and a leg, and you can buy multi-units that can hold more than one bridle. I like to add some sponge to the top of my bridle hooks to ensure they don’t pinch my headstalls.
A budget-friendly option is the Tough 1 Metal Bridle Holder with Hook at a great price of $11.33. While this adds up when you need several hooks, I decided to go for this option as the hook comes with a secondary hook built-in that I could hang my halters on, ticking one more item off my checklist.
Total Cost: $56.65 (Five bridle hooks at $11.33 each)
Training Gear
I needed space where I could store my training gear (lunge lines, lunging whip, driving whip, roller and side reins, and a notebook to track progress) safely and neatly. So I came up with a clever way to store these items neatly…
With one of the large plastic buckets I had gotten from the local painters, I created a “training bin.” I added a salvaged piece of four-inch-wide PVC waste pipe, which I glued to the inside of the bucket. The pipe is great for storing my crops and whips too, so I got to tick off another item from the checklist.
After drilling two large holes through the side of the bucket near the top, I added two carabiner hooks (from the saddle rack designs) that I could hook my lunge lines through. The lunging roller folds up neatly to fit into the bucket, and with the bucket handle, I can even mount the whole bucket to the side of my tack room cabinet or the tack room wall.
Total Cost: $0. Zip, zero, zulch!
Psst: A good alternative to the bucket is to take a bit of leftover pool noodle and cut it in half (down the length). Then slice a few slots into the noodle with a knife before mounting it onto a piece of wood such as a slat from a wooden pallet. The slots are great for holding whips and crops, and you can add a cup hook to the wood for the carabiners to hold your lunge lines.
Helmet Hooks
I’m not that fussy with how I hang my helmets. The expensive ones go in their helmet drawstring bags, while the ones I use for more everyday riding are hooked over one of the many utility hooks in my tack room. But of course, you can go a little fancier if you want to!
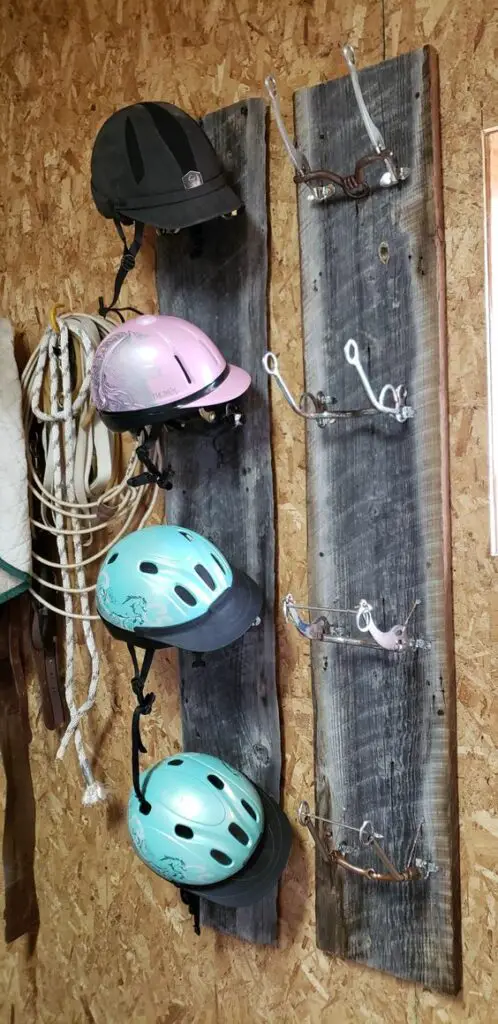
This helmet holder made from old bits is a real treat. You can also make things a little nicer and add a tennis ball to the hook of your utility hook to ensure your helmet doesn’t get pulled or distorted by hanging from the harness.
Total Cost: $0
If you have to buy hooks and tennis balls, it may cost you a couple of dollars, but I had these laying around (and I’m sure many of you do too), so I’m gonna chalk this up to a save!
Washing Gear and Grooming Space
Horse owners tend to bathe their horses more than they wash their cars, so having space for all of your washing equipment is vital. I found the ideal solution: put the shampoo, sponge, sweat scraper, and various other brushes in a bucket. Then I add the heavy duty steel-toed boots I wear when it’s wash day to the bucket by using some boot clips at $5.97 (and I’d have spare too).
For the grooming equipment, I enjoy using a shoe organizer that I can hang behind the tack room door. This allows me to see exactly what brushes I have and which need cleaning. Best of all, the pack I found has two sets with 12 shoe pockets each, so I can use one for grooming stuff and the other for medicine and bandages—and all for a steal at $13.87.
Total Cost: $19.84
- $5.97 for the boot clips
- $13.87 for the shoe organizer
Medicine Storage
Most of the medicines fit nicely in the shoe organizer mentioned above, but I also keep a few recycled supplement buckets to fit some odds and ends into, which I can easily tuck away on a shelf.
Crops Storage
The crops and whips I stored in the training bucket or on the pool noodle shelf, so if I have an extra long whip that doesn’t fit, I can stand it against the side of the cupboard.
Day Sheets and Fly Masks
Day sheets and fly sheets can be a problem to keep clean. I love recycling shopping totes and these Ripstop totes are really great too. At only $14.99 for a set of five, I can really tidy up and store a day or fly sheet in each bag. I usually keep one bag for fly masks, which I then hang from one of the many utility hooks that I have in my cupboard.
Total Cost: $14.99 (for a set of five shopper bags)
Space for Boots and Wraps
Another shoe organizer is a great idea for storing bandages and horse boots in a neat way. This one I add to the side of the cupboard, or I can hang it by a nail from an expansion bolt.
Alternatively, I used some more of the PVC pipe I’d found with a four-inch elbow that is mounted on the inside of the cupboard with the elbow at the bottom. I simply throw new bandages into the top of the pipe and take ones to use from the bottom of the elbow. Screw the hose clamps (at $7.19) to the wall, then add the four-inch pipe before tightening the clamps to hold the pipe upright.
Total Cost: $11.78
- $7.19 for the hose clamp
- $4.59 for the PVC elbow joint
Space for Rider Boots and Half Chaps
Since I have so much space because everything is off the floor, I can easily slide my boots under the cupboard or stand them next to it. I can also use another of the shopping bags I bought to hang my boots with.
Total Cost: $0
Another saver at zero cost.
Space for Halters
My halters are paired with their bridles on the bridle hooks, so I didn’t have to buy extra, but I like to be prepared, so I added another set of utility hooks to my shopping cart. I found these utility hooks at $25.97.
Total Cost: $25.97 (for the utility hooks)
Bin for Trash
Now, I wasn’t going to spend money on a trash can. So instead, I easily used one of the buckets I’d sourced for free!
Adding Up My Tack Room Budget Spend
Had I won the challenge to decorate and organize my tack room for only $150? Let’s add up.
Cost for the items I had to buy supplies for:
- Saddle racks = $20.94
- Saddle pads = $12.95
- Bridle hooks = $56.65
- Washing and grooming gear = $19.84
- Day sheets and fly masks = $14.99
- Halters and extra hooks = $25.97
- Boots, wraps, and bandages = $11.78
The Final Total: $163.12
Final Thoughts on Cheap Tack Room Ideas
Okay, so I came in a little over budget, though there were a couple of things where I could have used the DIY versions rather than buying a nice-to-have hook or rack. I also included another set of utility hooks, which if I left it, I’d be perfectly under my $150 target.
The secret to creating a stunning tack room on a shoe-string budget is to consider each item and find an alternative that you can make or where you can repurpose items.
A functional tack room is an investment in your riding pleasure, but it doesn’t have to break the bank. Tack room ideas on a budget can help save you loads, and it’s fun to make your own solutions.
Happy organizing and saving!